Hand-made dining table and tips for working with live edge slabs
I built dining tables out of live-edged walnut and maple slabs, with pegged mortise and tenon bases that can be knocked down and flat-packed.

I wanted to design and build a new dining table for my flat in London, which was lacking such furnishings. The dining table would be built in my woodworking shop room in Palo Alto, primarily with hand tools and largely traditional techniques. Since work is always so busy and occupies the vast majority of one's time, the table was built over an approximately 12 month period working occasionally in the evenings and weekends. The table top was so large that many steps had to be completed outdoors. Some of the parameters:
- The table would consist of natural wood slabs, using hardwood common in this part of the world to reflect its American heritage. I love working with walnut, so chose this as the base wood.
- The table needs to be able to be 'flat packed' Ikea-style, so I could ship it from the USA to UK without consuming too much volume.
- The table must be built using traditional woodworking techniques with no metal fasteners showing and no use of fancy metal brackets.
- I would build using a 'slab' of wood, because such things look really cool and are very popular. It would also be a personal challenge to build a thick, 9+ foot table single handedly and move it around.
- No metal legs. I think wood slab tables with metal legs look really ugly and have little skill involved in building them - take slab, whack through planer, sand, varnish, screw legs on. This would be a traditional wooden base.
The damn thing ended up being so heavy that I needed help to move it around the house, turn it upside down and put it together. However it was an incredibly rewarding projects that has earned many complements. Documented here are a number of the steps and the outcome.
Design
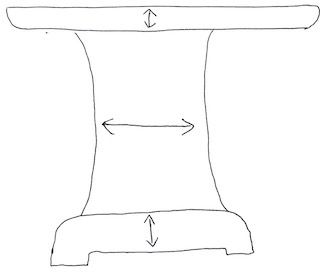
Because of the need for flat packing and the high cost of wood, I opted to build a modified "trestle" table. A trestle table has a couple of ends held together by a stretcher in the middle. The great thing about trestle tables is that people can put their legs and feet underneath without hitting a lot of table structure, and a well built trestle table can be dismantled and put back together easily. I decided to go one step further and hold together the ends and the stretcher with wooden pegs so just one tap with a mallet would allow the table to be pulled apart. These rather naff sketches show the layout (the original was done in my Windows95 VM which won't launch on the M1 Mac):
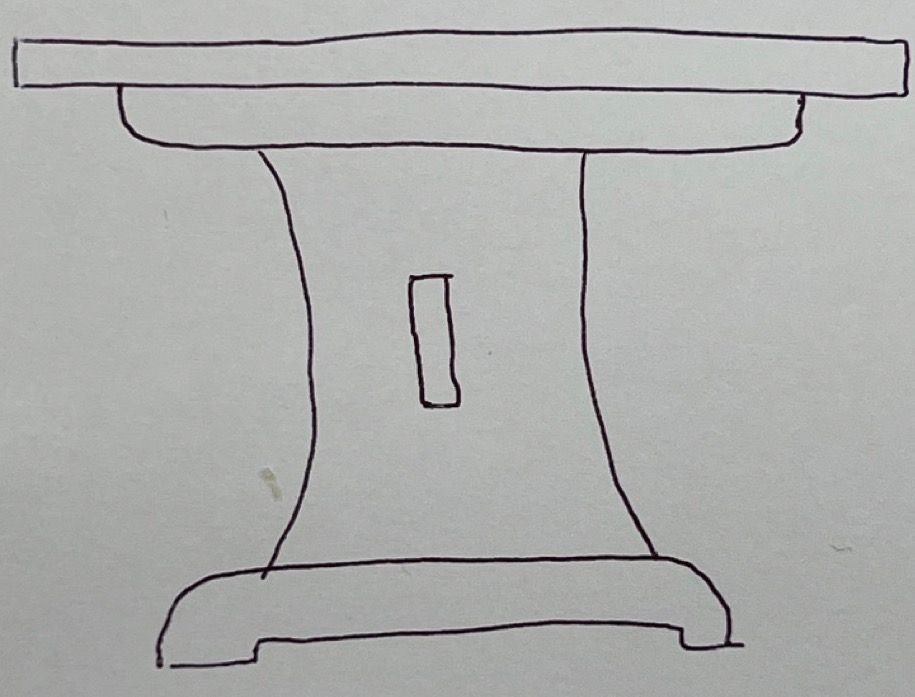
The green bits are the pegs that would securely push the stretcher against the frame and keep the table rigid. The shaded area is an additional piece of skirting
Pitfalls of working with live edge slabs
Traditionally when we build table tops out of wood, we use multiple timber planks that are jointed (using a jointer plane, naturally, not a machine!) down the edges and glued together. We choose planks with nice straight grain and alternate the growth rings up and down with each adjacent plank so that if there's a moisture imbalance, the top will stay level overall and not cup or sag.
With live edge slabs, all bets are off. The wood tends to be much thicker and the grain runs all over the place in all sorts of directions. Avoiding cupping is particularly difficult, as discovered by my builder friend Pete in London. So what are the things that we can do to avoid this?
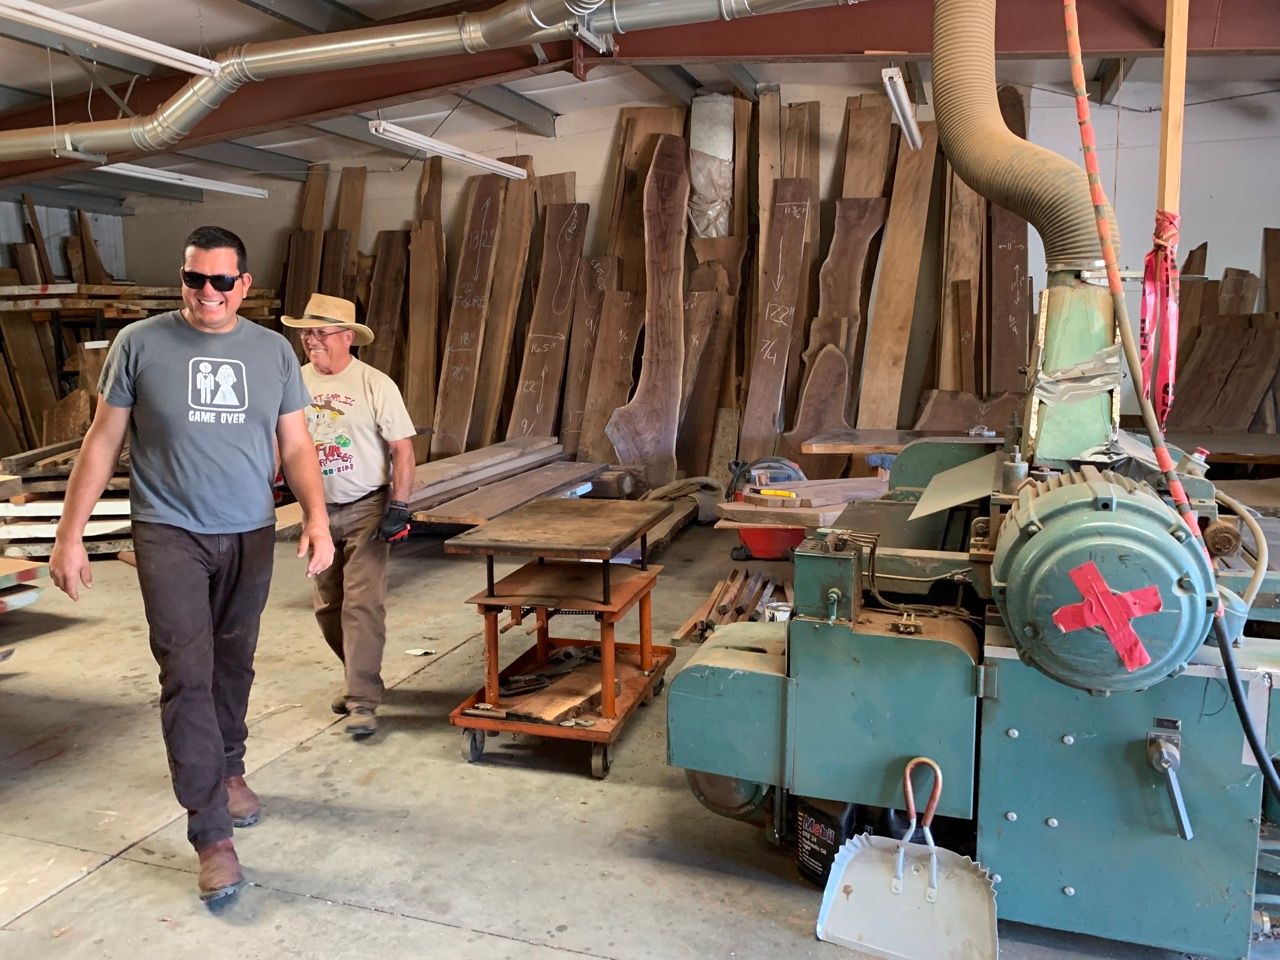
- Make sure the moisture content of the wood is even. This means that it's been purchased from a really good lumber yard, kiln dried, by someone who does a lot of work with live edge slabs and knows how long these things take. Jim Baker at Baker Hardwoods knows his trade incredibly well. I've been buying slabs from him for years, he's the nicest chap and has very good prices in his family business.
- Cut it roughly to size, then let the it acclimatise. Alternating boards with straight grain will take changes in humidity really well, but gnarly live edge slabs won't. In this particular case I left the wood slabs upright indoors in Palo Alto for almost a year before working them.
- After taking any twist out the boards (almost guaranteed there will be twist), leave it yet again and come back and check!
- Try to keep the boards thick. Because of twist, you lose a LOT of thickness if you want something flat. This means, buy wood as thick as possible, so thick you can barely lift it. Personally I think it's OK that such a table top isn't as mechanically flat especially over such a large area. I try to get it pretty close though, but at some point I'll trade thickness for flatness. Some very minor ups and downs over a large area shows the natural nature of the wood and isn't noticeable by anyone unless they start crouching or bring out a straightedge. As long as your plates and wine glasses don't wobble it's good in my book!
- Put some finish on the underside too - to try to keep moisture absorption somewhat even. The underneath doesn't have to be beautiful but I've found leaving one side completely unfinished will make the resulting table more prone to cupping.
Having built now four or five live edge pieces (a coffee table, two dining tables, some accessories and a mantlepiece) I've learned how important these lessons are.
Buying timber
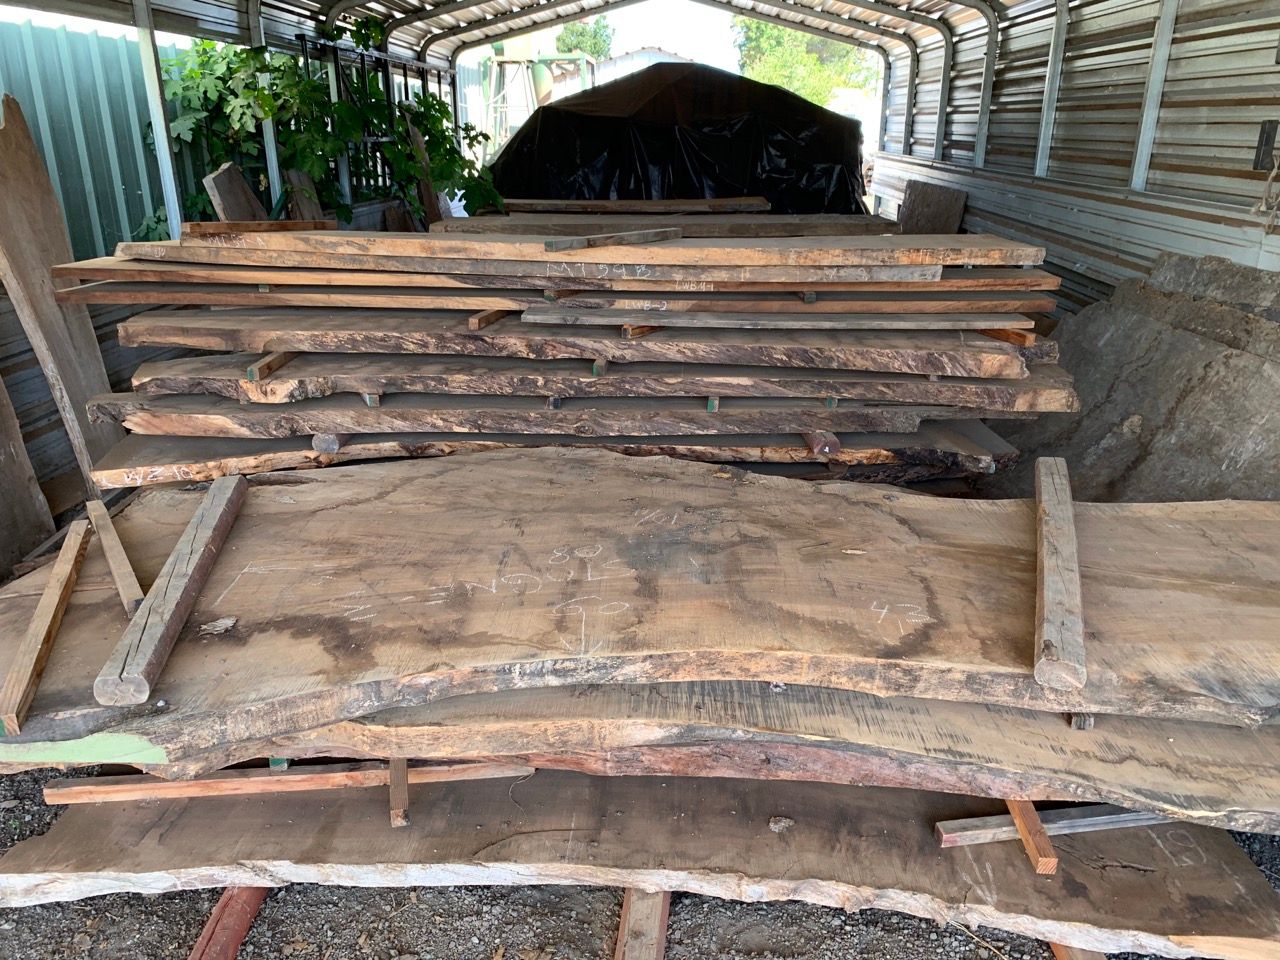
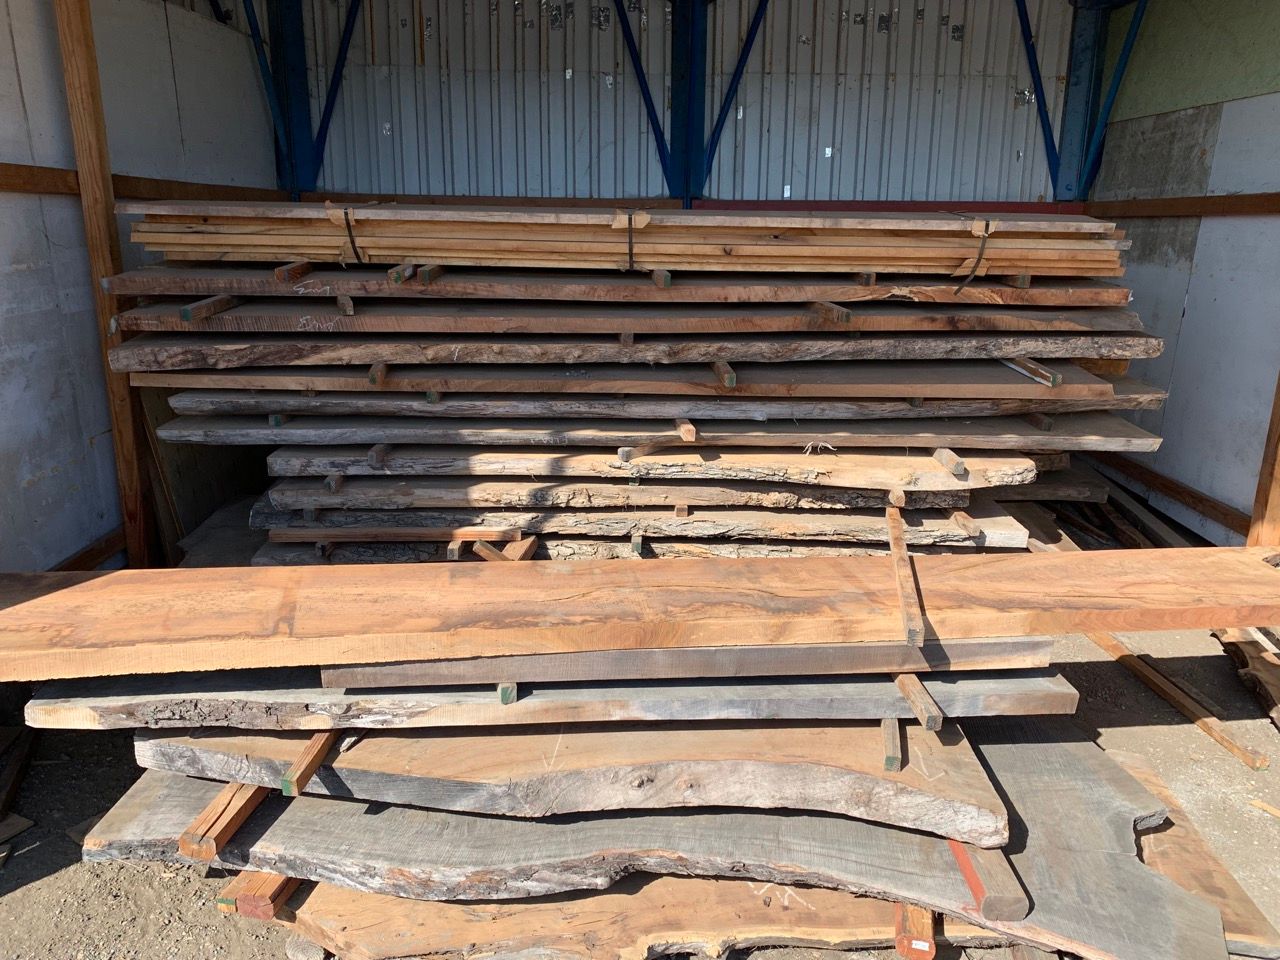
Per the above, I chose really nice, thick walnut slabs and took them home. I also decided to buy two table tops at the same time, given I had to get a friend to bring his vehicle down to move all of the wood. Some pieces were over 9ft long and there's no way that will fit in a Tesla. Mr Baker kindly did a light run through his mega planer – a process which requires earplugs and keeping ones distance – which doesn't get the tables finish ready nor does it take out any twist, but it does help at least get rid of the bandsaw marks and give some indication as to how many pits and peaks there are in the slabs. Baker Hardwood has an incredible collection of well-kept cost effective slabs:
Building the top
When people look at tables, all they really look at is the tabletop. The rest barely matters. It's therefore essential that the majority of the effort and attention to detail of building tables goes into making amazing tabletops.
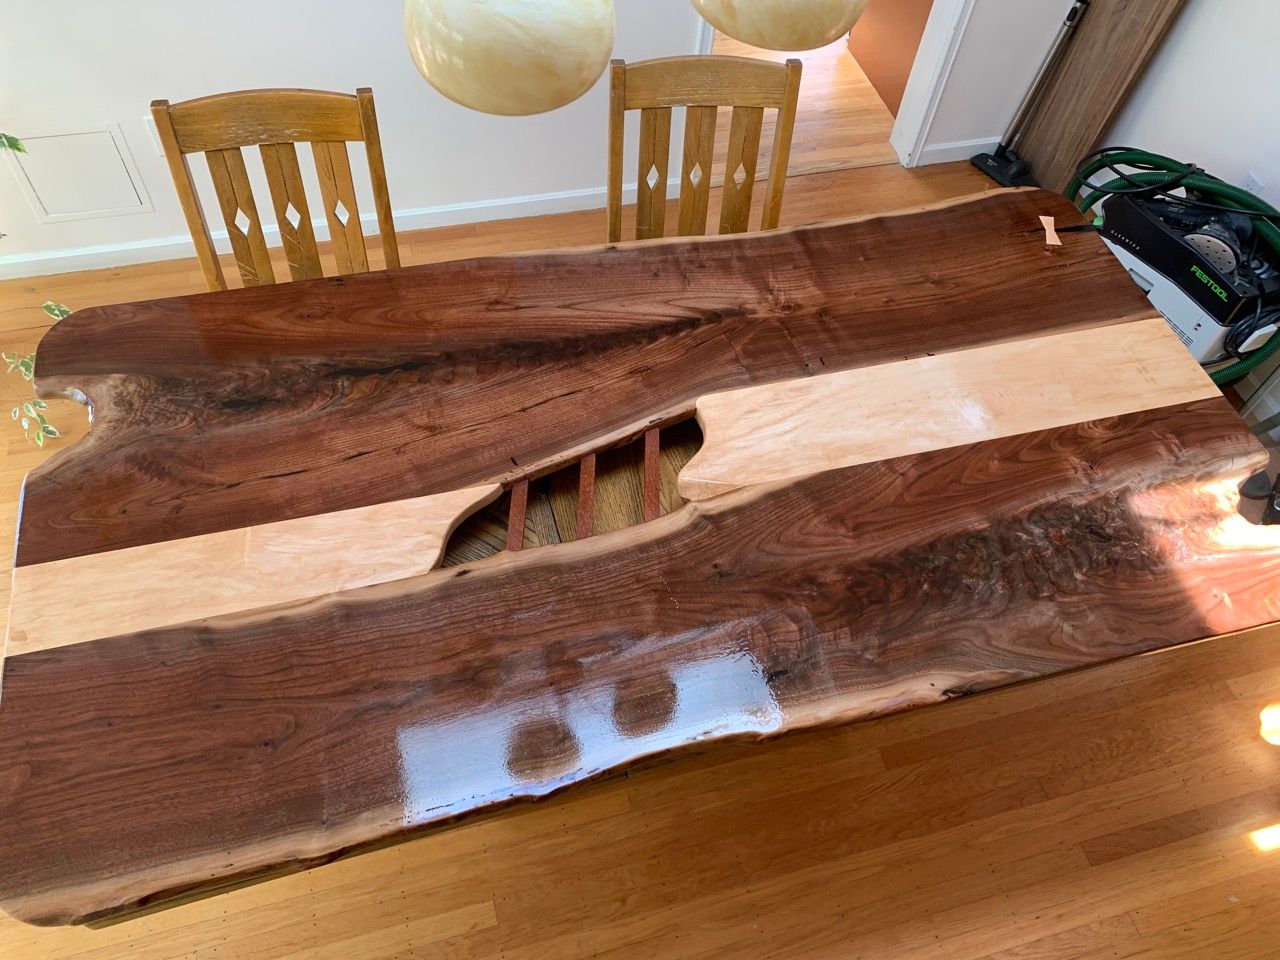
I'd purchased two pairs of book-matched slabs. In one case the slabs were of largely equal proportion but in the case of the UK table, they were slightly oddly shaped. I decided to go whole hog on the adventure scale and place them in opposite directions, back to front. This would mean I have to waste less wood, but leave a variable amount of space in the middle as well as a small hole in the tabletop. I theorised that a small hole could be useful for power cables for laptops and for a drain pipe for a Chinese tea set, so decided to 'own the hole, make it a first class citizen' and make it look good by placing a carved shape in there instead. The overall layout of the upside down pieces looks like this:
The steps in building the table top were as follows:
Cut to size, remove twist and set thickness
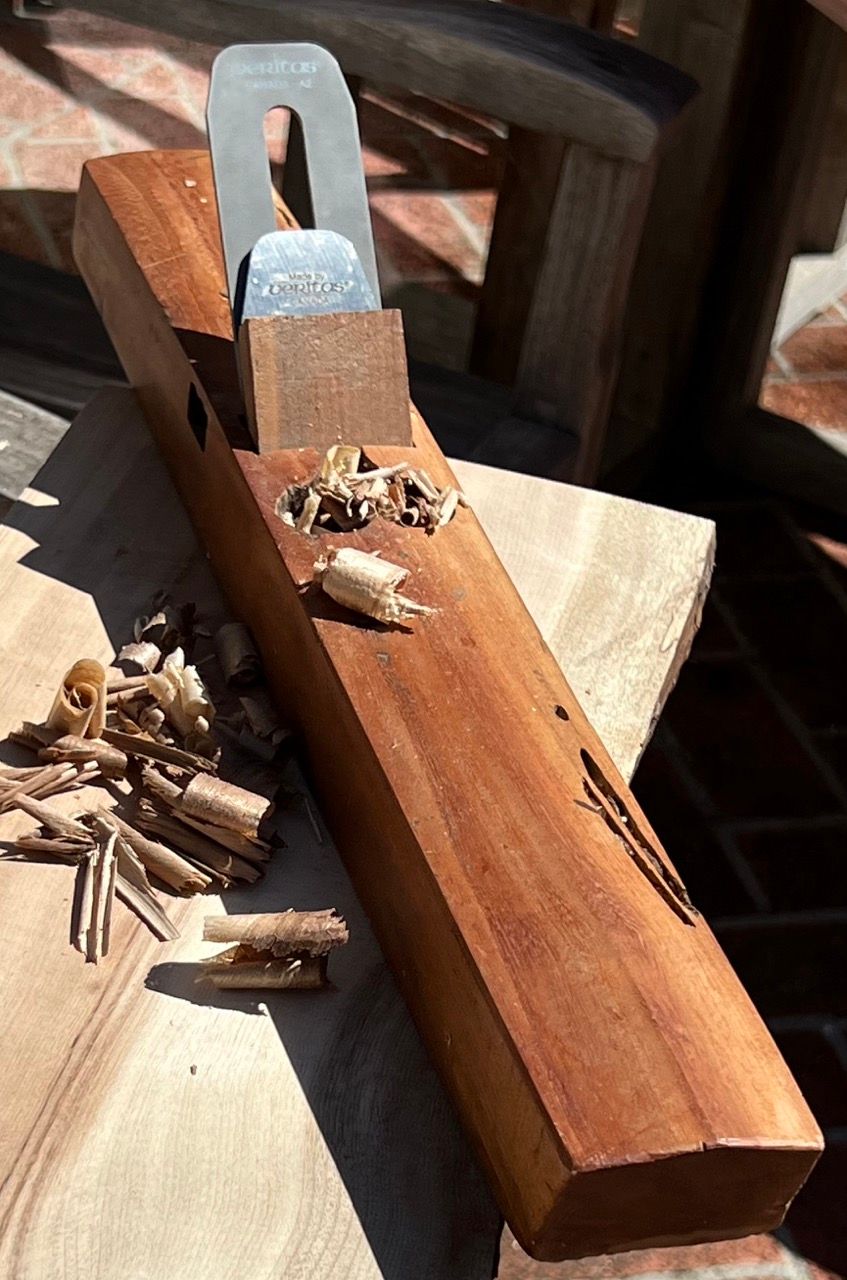
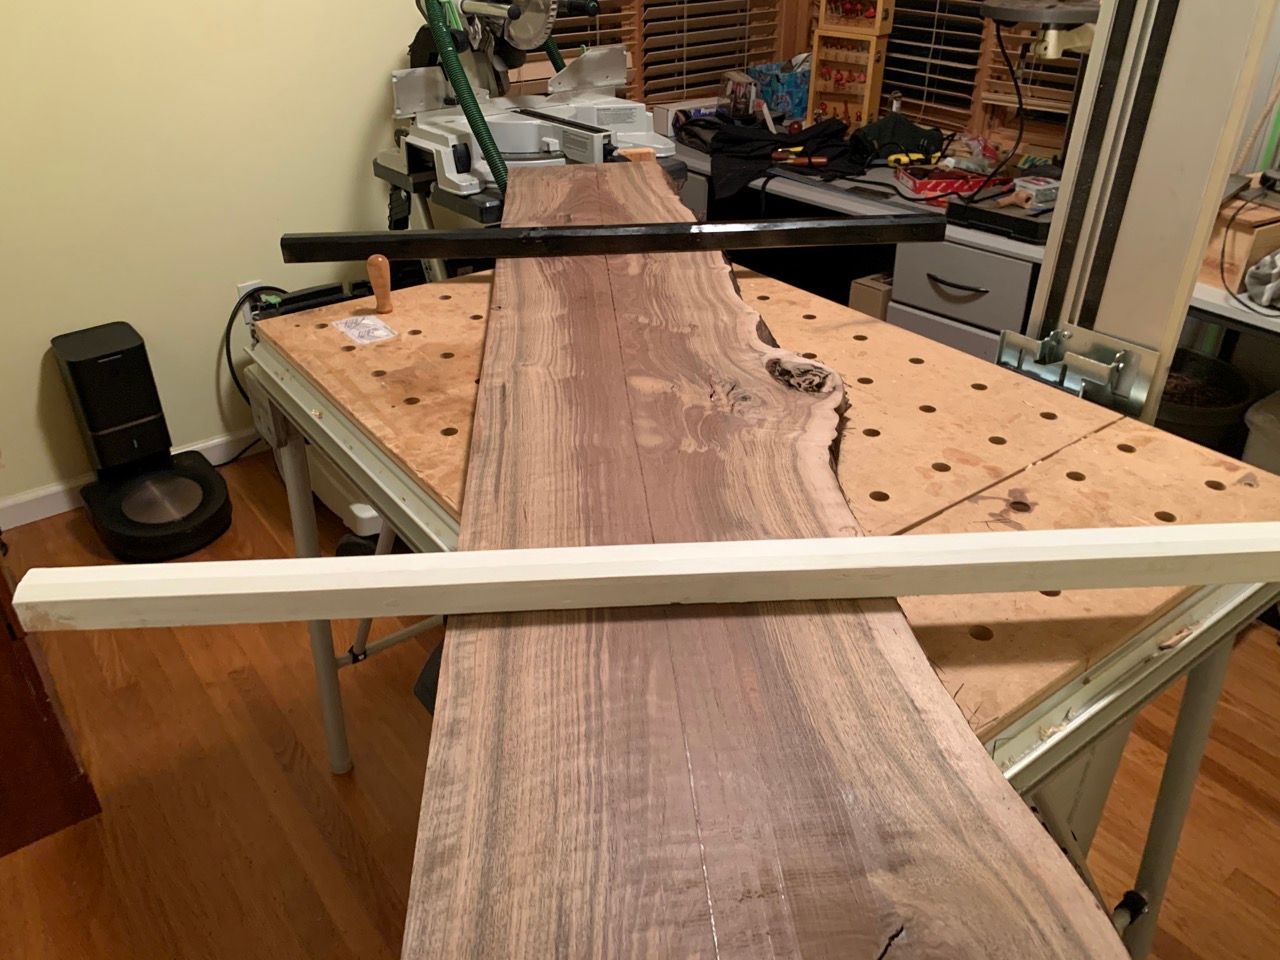
The first step in working these slabs was to cut them to rough size with the Festool track saw. I don't use table saws, they are too dangerous, especially for handling large goods single-handedly and I don't want to lose my testicles to kickback, thank you very much. Then, using a scrub plane for bulk removal followed by an antique restored Chinese jack plane and home made winding sticks, I removed the twist in the boards. Winding sticks show if the two ends are out of plane or not by sighting down them, the scrub plane takes off shit tons of wood quickly, and the jack cleans up the mess left behind by the scrub. This is a process that took hours for each board – split over many days – and ended up losing almost 1/4 of the original thickness but the resulting table top was very level and of even thickness.

Clean off the bark
Live edge slabs have bark and mess along the edge, termite holes in the sapwood, all that sort of thing. It has to be cleaned out. Thick bark is chipped off carefully with a chisel, thin bark is wet with water and then peeled off. Then the edge is brushed down with wire bristles until it looks good and the natural colour of the wood is coming out. Remains of twigs sticking out and such things are planed off, chopped off with a chisel or (sinfully) rapidly sanded off with a Festool Rotex.
Hole and gap filling
I then knocked through loose pieces of wood in knots and filled any knot holes with black epoxy. A couple of large cracks in the board were filled, too, in order to help stabilise it. Small termite and bug-bored holes in the soft sapwood on the outside were filled too. This also takes a long time, the pouring epoxy I was using takes a day or two to cure and it leaks like crazy on the first pour, no matter how wells holes are taped up (I've tried hot glue, AC duct tape, other forms of tape, tape with hot glue, doesn't matter, some epoxy always gets out and drips). After filling the knot holes, the excess epoxy is removed with a hand plane and then all the tape and glue and whatnot from the bottom is chipped and removed too. A very frustrating process. In later tables, I've refined this technique so that for the first pour, I use very little of a 5-minute, rapid curing epoxy which helps plug any holes with minimal run-off, then move to the slower setting stuff. The majority of large holes can't be filled with the rapid stuff because it shrinks too much when it sets in large quantities.
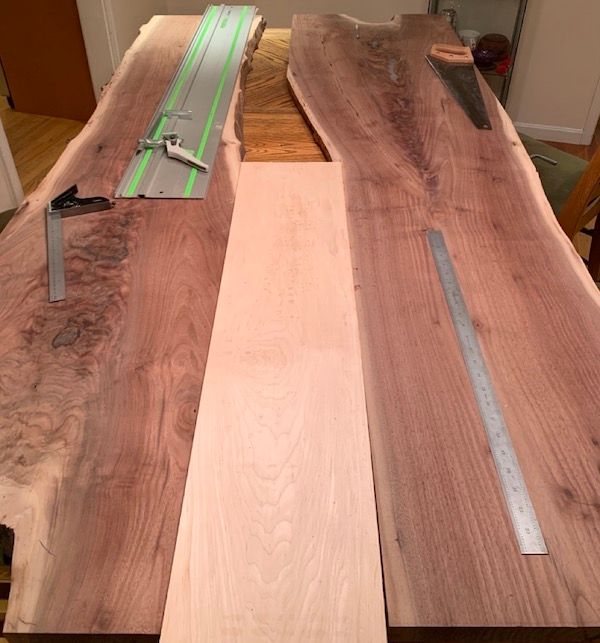
Laying things out
I purchased some maple planks from Global Wood Source to place between the pieces of walnut and give some contrasting colour. I ripped them to size on the Festool track saw and set about carefully planing the widths and edges of the maple boards and the surrounding walnut until they fit together perfectly with no visible glue lines. This required a lot of very frustrating work, repeatedly lifting and moving massive pieces of wood back and forth until things fit perfectly. It really tested my patience and at some point I felt like perhaps this was too much of a challenge - but eventually made them fit! I was able to carve some nice curves on the inside pieces to make them 'flow' with the natural shape of the table.
Glueing things up
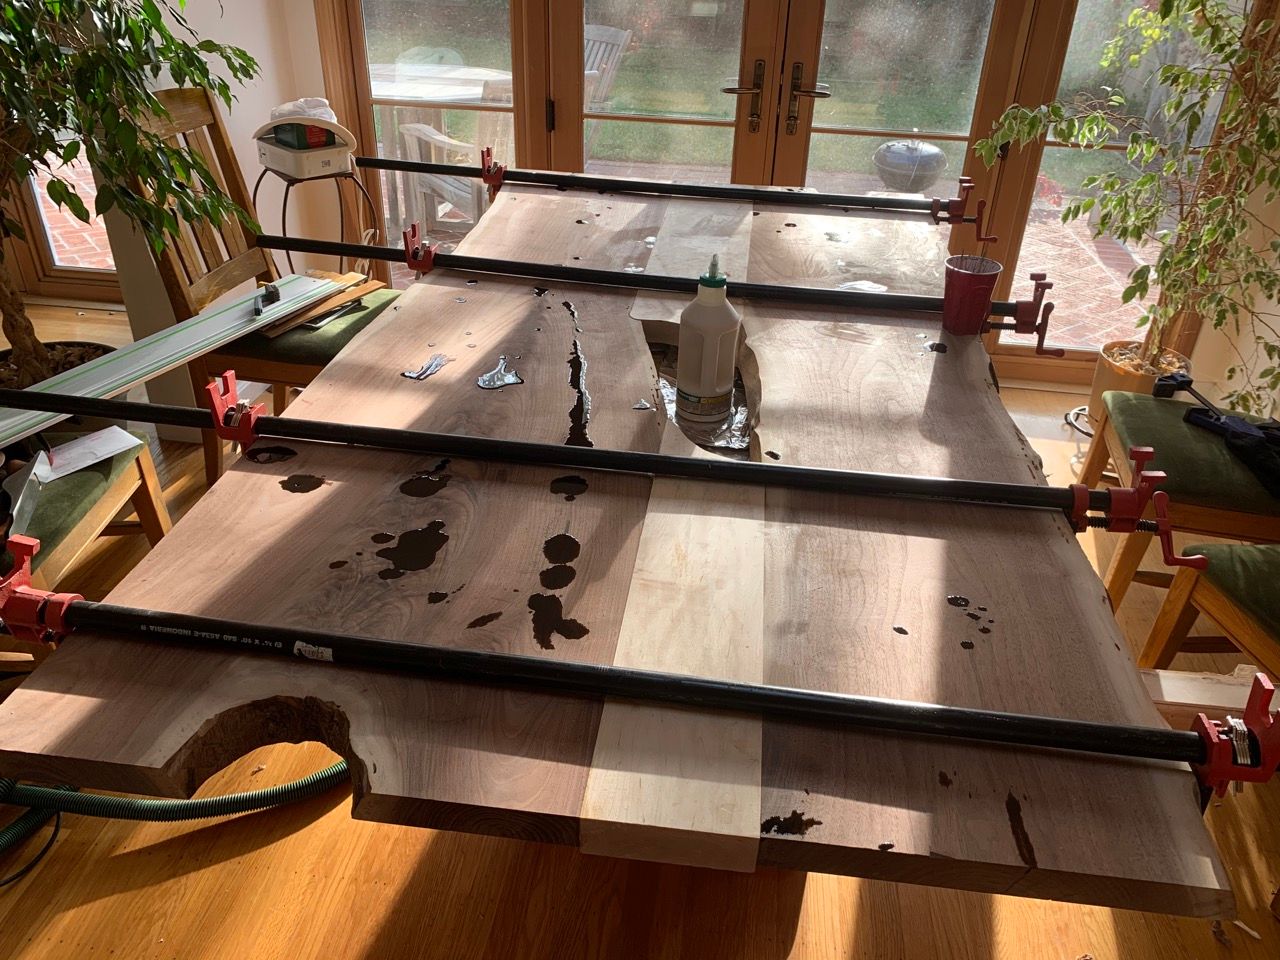
This was incredibly challenging! Not only are the pieces so damn heavy that I can barely lift them, they must be very carefully aligned. The wood glue sets incredibly fast so there's not much time to work. The only redeeming quantity of working with such thick pieces of wood is that balancing the clamping force on top and bottom matters less, the wood's so thick it won't really bend or warp during glueing.
By some miracle, I got the thing glued up and stuck together beautifully. I now had a table top so heavy I could lift it, but couldn't move it. I was just about able to turn it upside down by using all my strength and, of course, if it fell on me I'd have been seriously injured.
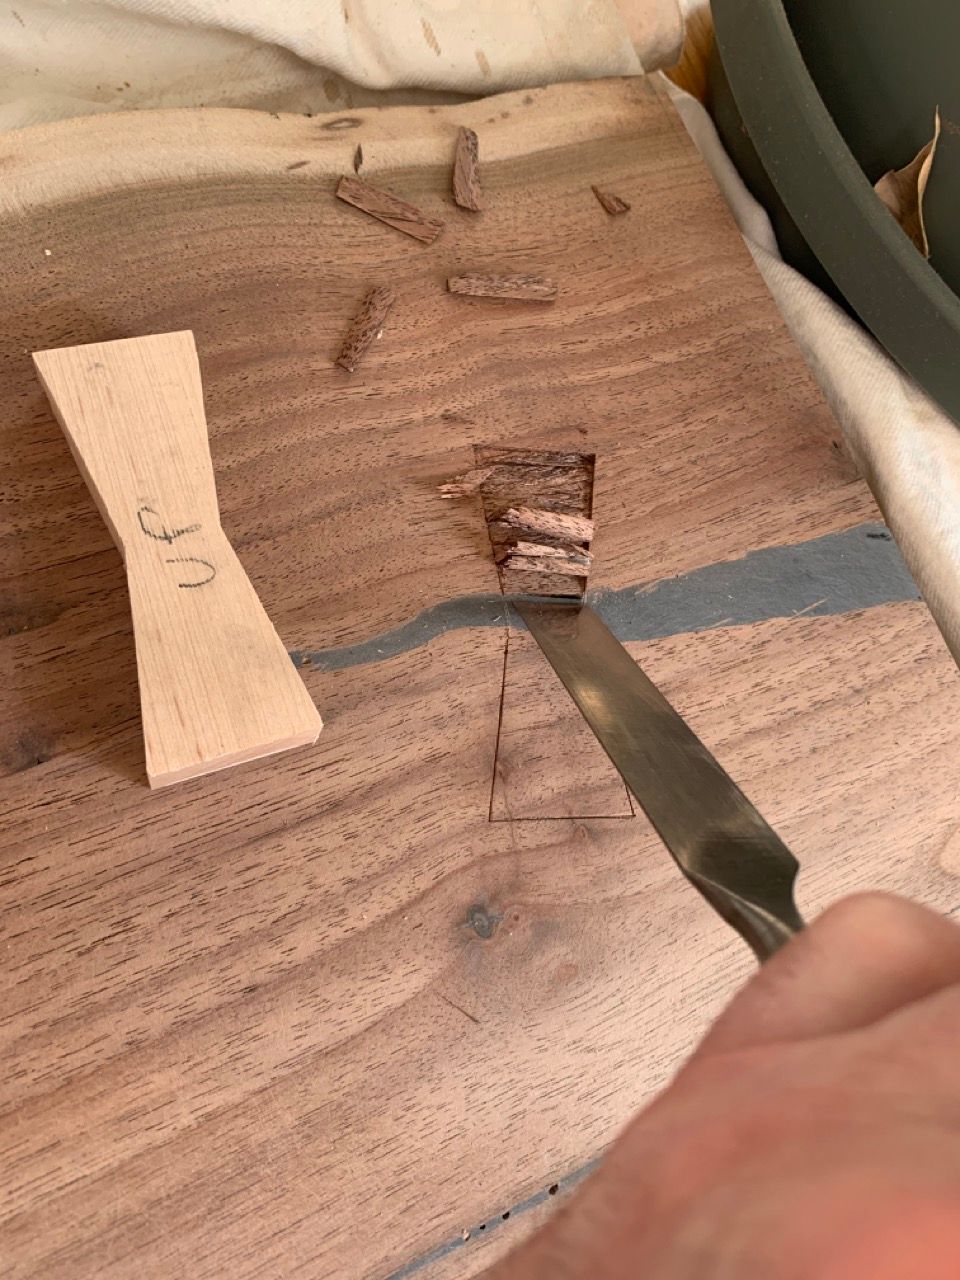
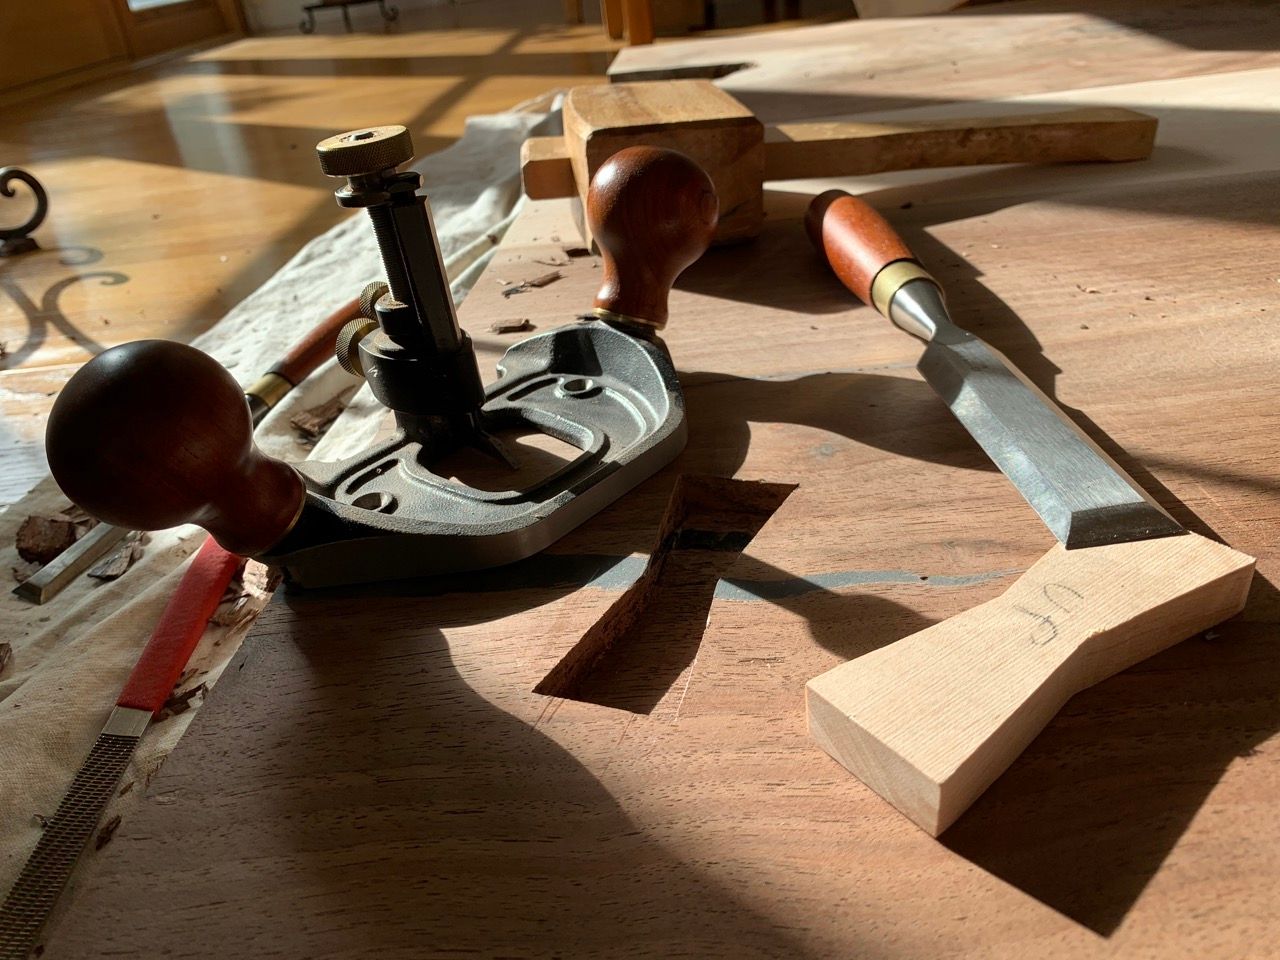
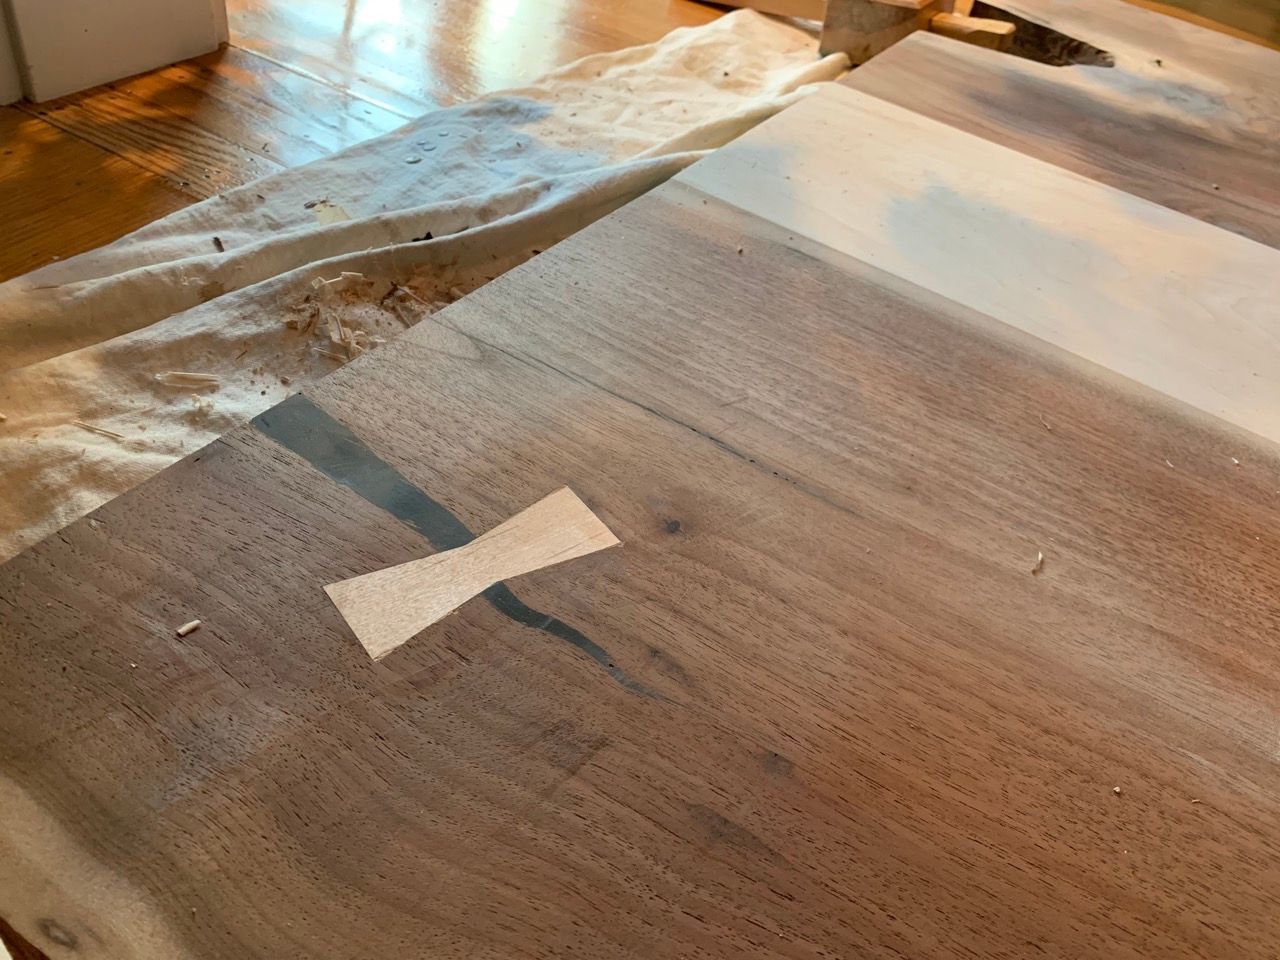
Inlaying a butterfly joint
Traditionally, to stop cracks in wood expanding, one uses a 'butterfly' joint where a piece of wood, in the shape of a bow tie, is inlayed across the crack in order to stop the sides from pulling further part. Because I'd filled the only large crack with epoxy, this was technically completely unnecessary, but I liked the look. So I cut a piece of maple with my handsaw, used a chisel to pare down the sides, then chopped into the top of the table top to inlay it and flattened the bottom of the hole with a handheld router plane (not an electric router!). The butterfly is 3/4 inch thick and was then planed flat to the table top.

Planing
The final step was to plane the whole table top roughly flat. I used a Lie Nielsen Jointer plane over the length and width to get it close, then a high-angle No 4 Smoother over the rest of the table top to take out most of the tear out due to the wood grain being all over the place. Even after the high angle smoother, there was tear-out where grain direction changed a lot (despite planing it every which way to Sunday). I took that out with a card scraper. As a result of planing in different directions and the alternating grain, the sheen on the top still wasn't consistent enough so I sanded it with 220 and 320 grit sandpaper. I've built smaller, non-live-edge table tops with solely a smoother plane with delicately cambered iron, without using sandpaper at all (how I was trained at school) but I think live slabs with crazy grain make this basically impossible.
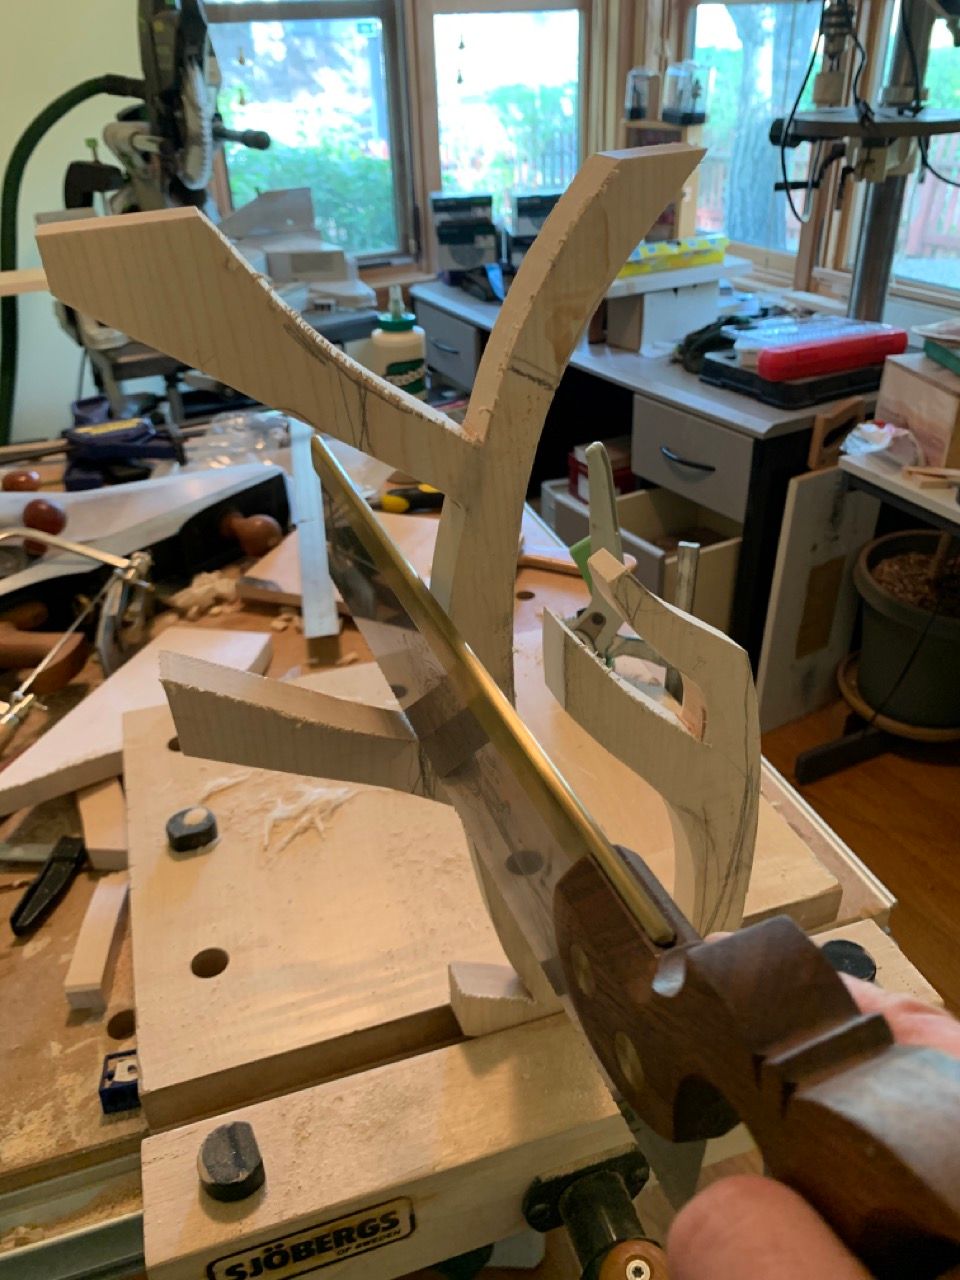
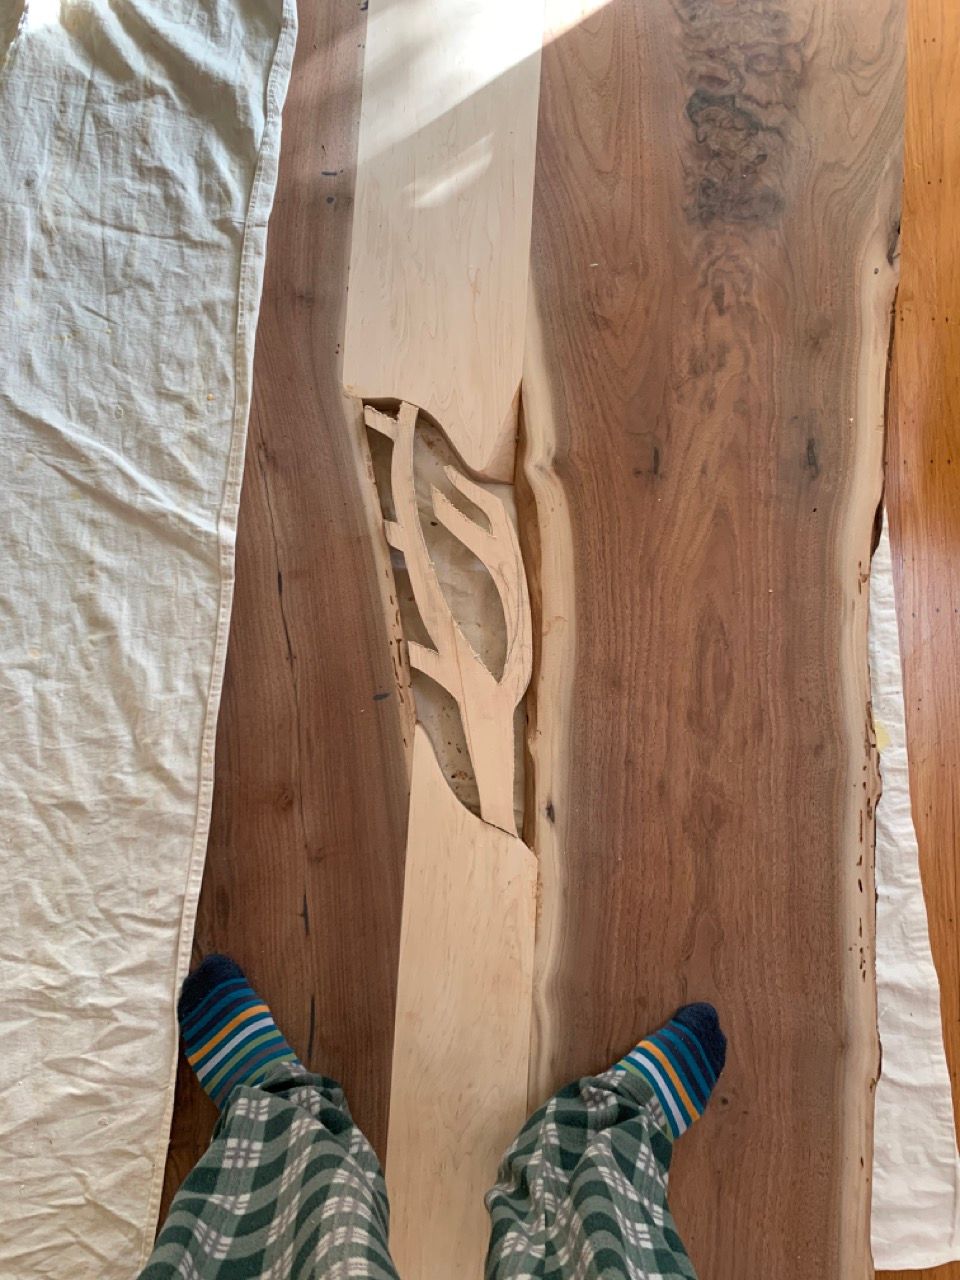
Dealing with the hole
My friend TG Nguyen who runs a design company called TGNguyenDesigns mocked up some ideas in photoshop. We came up with the idea of putting an organic tree-like form into the hole. However I wanted the form to be removable so I could put cables in and out. I used some scrap cherry wood across the base of the hole in order to provide a supporting platform, some depth and nice contrast, and then traced and cut out the design on some maple, planed it to thickness (in retrospect I'd have planed it before cutting!) and plopped it in place.
Finishing the top
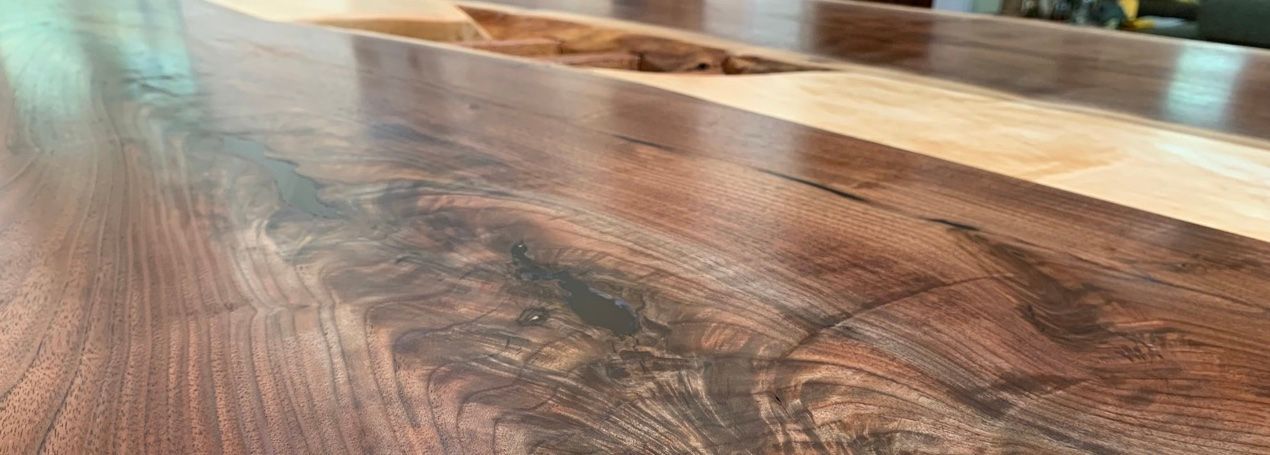
The table as a whole is finished with Waterlox original sealer finish. This is an old school finish that's quite easy to apply. It's an oil and varnish mixture. The grain of the wood pops wonderfully due to its tung oil content yet the finish is far more durable than pure tung oil on its own. The first coat or two of Waterlox are brushed on super heavy and left to soak into the wood, and the remainder brushed on lighter, with 24hrs+ between each coat. In total, I did 7 brushed coats on the top, with a very very very light high grit sand (perhaps it was 600 grit, forgot) between final coats, and a wipe on coat at the end. The grain of the wood is just stunning. The whole house stank of varnish for a couple of weeks (I have to say I quite like the smell of solvents, however!)
The reason for so many coats is to produce a thick build that I can sand back down a bit and rub into a matte finish with wire wool. In woodworking, this is called "rubbing out" the finish. I'm still yet to do this, but the Waterlox itself is a little too glossy for my liking.
Allowing for wood movement
One of the many reasons why amateur and even many professional woodworkers who aren't skilled in the trade get into trouble is failure to allow for wood movement. Wood expands and contracts across its grain due to changes in moisture content caused by different seasons, humidity, heating, moving or other such things. This is why you'll see "shaker style" cabinet doors or doors with floating/raised panels inside (in fact, for "kitchen cabinets" made out of stable plywood, it's just for show, but wood movement was the original reason). It's why good hardwood floor installers always leave a gap around the edge.
A beautiful slab table at the home of my friend in Estonia has a warped top, because whatever idiot built it felt that he or she could halt wood movement by putting huge metal bolts through the slab. In practice, all they did was make it warp instead—it'd have stayed flatter if it was allowed to move, but that would have then caused the metal legs to fall off, haha. I take pride in commenting on shit design and use of metal legs.
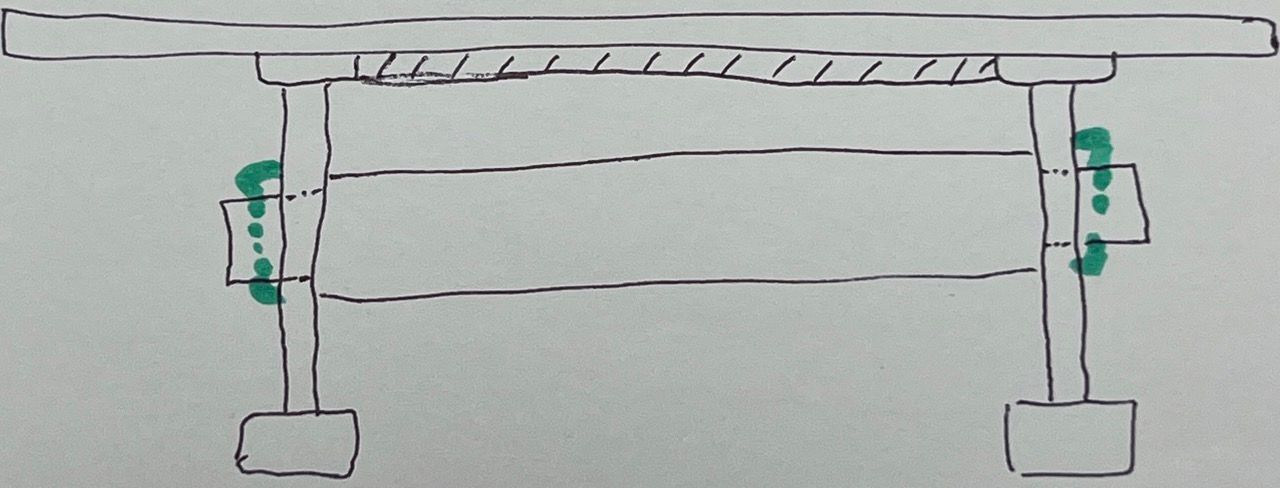
For a slab table with live edges, we don't need to worry about the top itself moving, except where it joins to the base. For joining such tops to the base, there are many tried and tested approaches, in this case I used "Z fasteners" that sit in a routed groove and allow things to move. However my design for the ends of the table has a particular problem with opposing grain. This picture shows the direction of grain movement on the pieces that make up each end:
This means that the ends can't be traditionally joined by mortise and tenon and glue without things messing up: Warps and splits will occur. A solution would have been to chop the centre piece into multiple smaller bits with gaps in between, but that would ruin the amazing look of the end slabs.
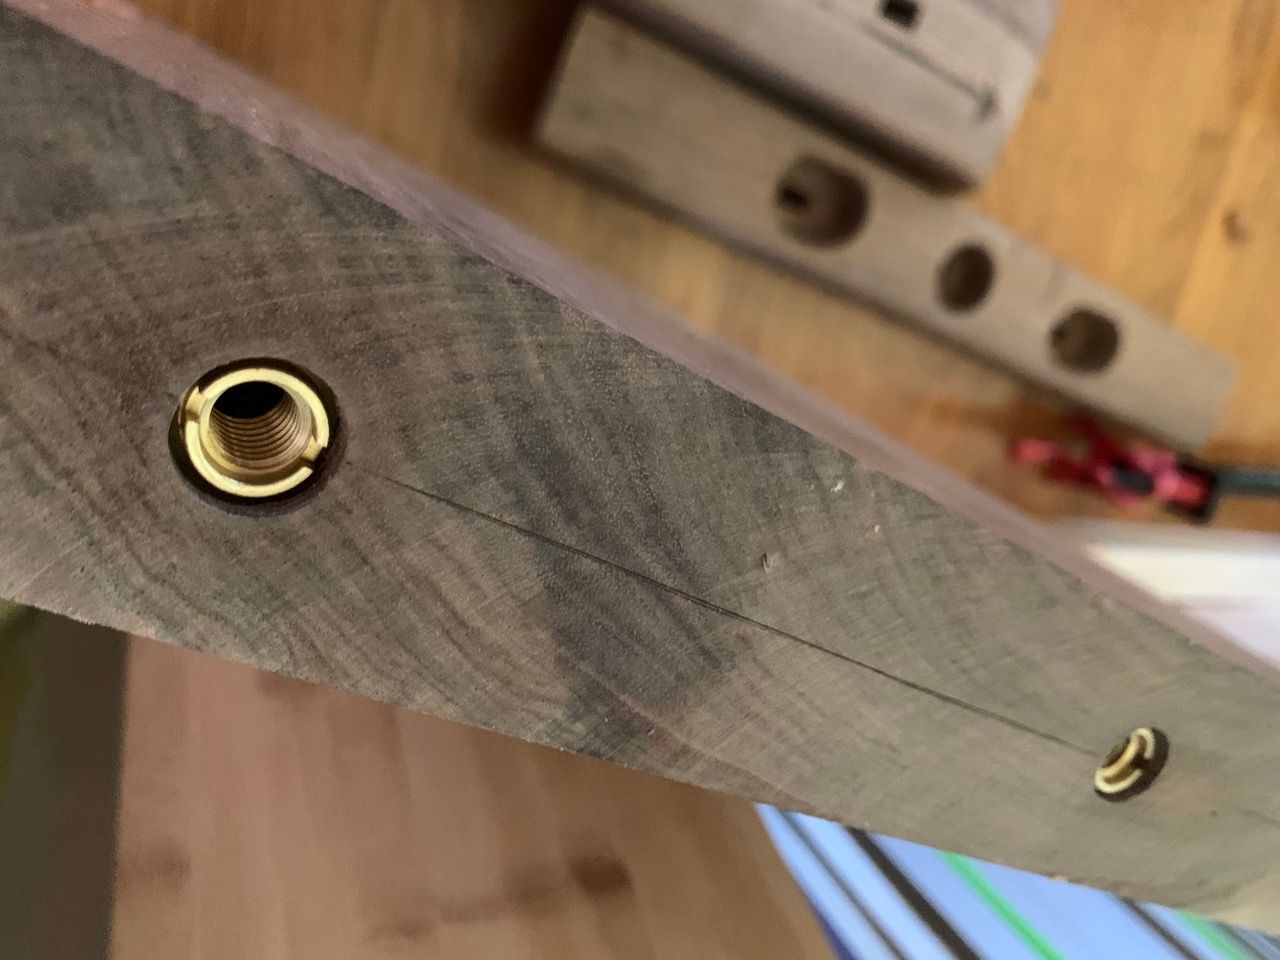
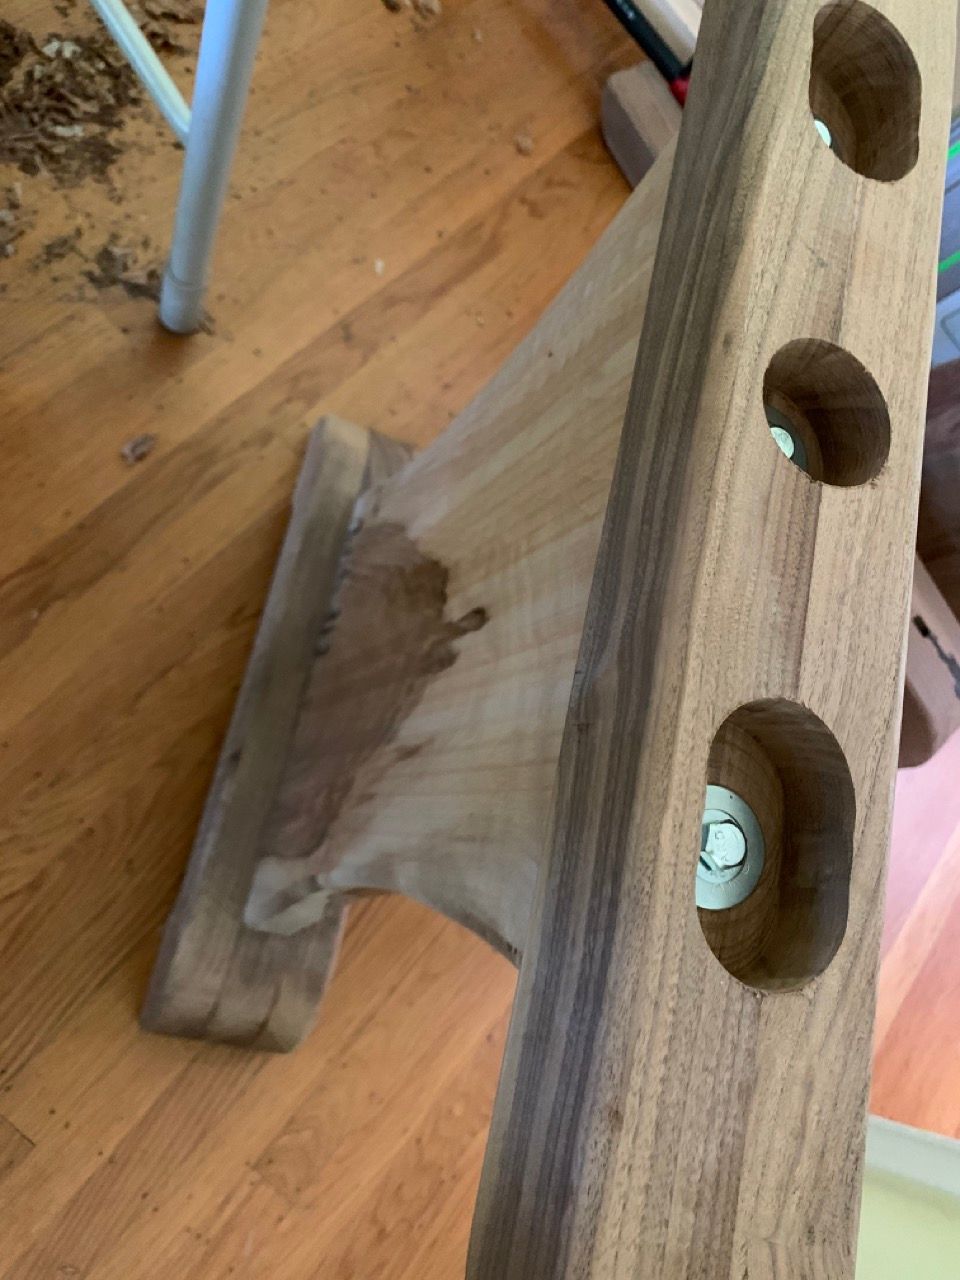
Instead, I chose to use these widgets that let one attach metal bolts into wood. The metal bolt in the middle of the column is tightened hard without wiggle room. However the ones at the sides are softer and have room to slide backwards and forwards in the base due to the bolt hole mortise in the ends of the base being chopped wide, as can be seen from the middle photo. This design has the additional advantage of allowing the legs to be dismantled for shipping.
Building the base
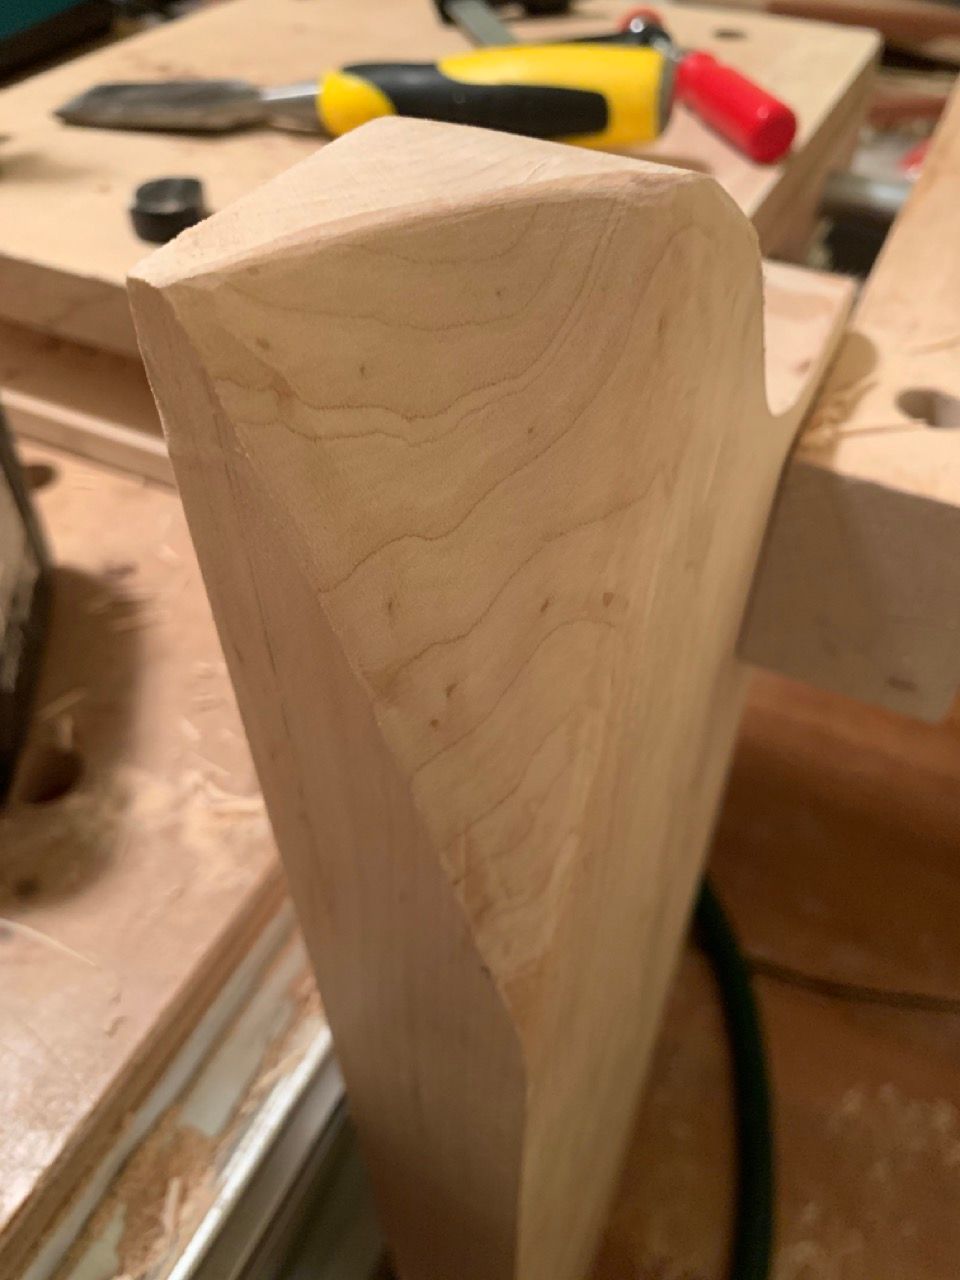
Building the base took a fraction of the time that the table top took. The only hard bit was really shaping the bottom part of the legs, and that wasn't technically hard it just took rather a long time. Since I was making two identical table bases, in other words 4 identical legs, I decided to go the 'mass production' route and build a template for the shape out of plywood. It would have taken forever otherwise... why? The bottom of each leg is built out of 3 glued-together walnut 2"x5" pieces, and the top of each leg is built out of 2 glued together 2x3" pieces. This means there are 20 pieces of wood to cut and shape identically and then glue together! I'm not a man with sufficient patience to do that solely with hand tools. So my approach was to cut the big planks into pieces roughly the correct size with the track saw then hand saw the curves on the edges to roughly what I was after with my Gramercy Tools tenon saw. I then stuck the templates on top of the pieces of wood and went round the edges with a router with a flush-cut trim bit in order to make them the correct size, then glued them up a piece at a time.
Overall the sawing, cutting and routing to templates was accomplished in two afternoons, a very high level of productivity for producing so many individual components. The pile of wood left behind from routing on the patio, however, was gigantic!
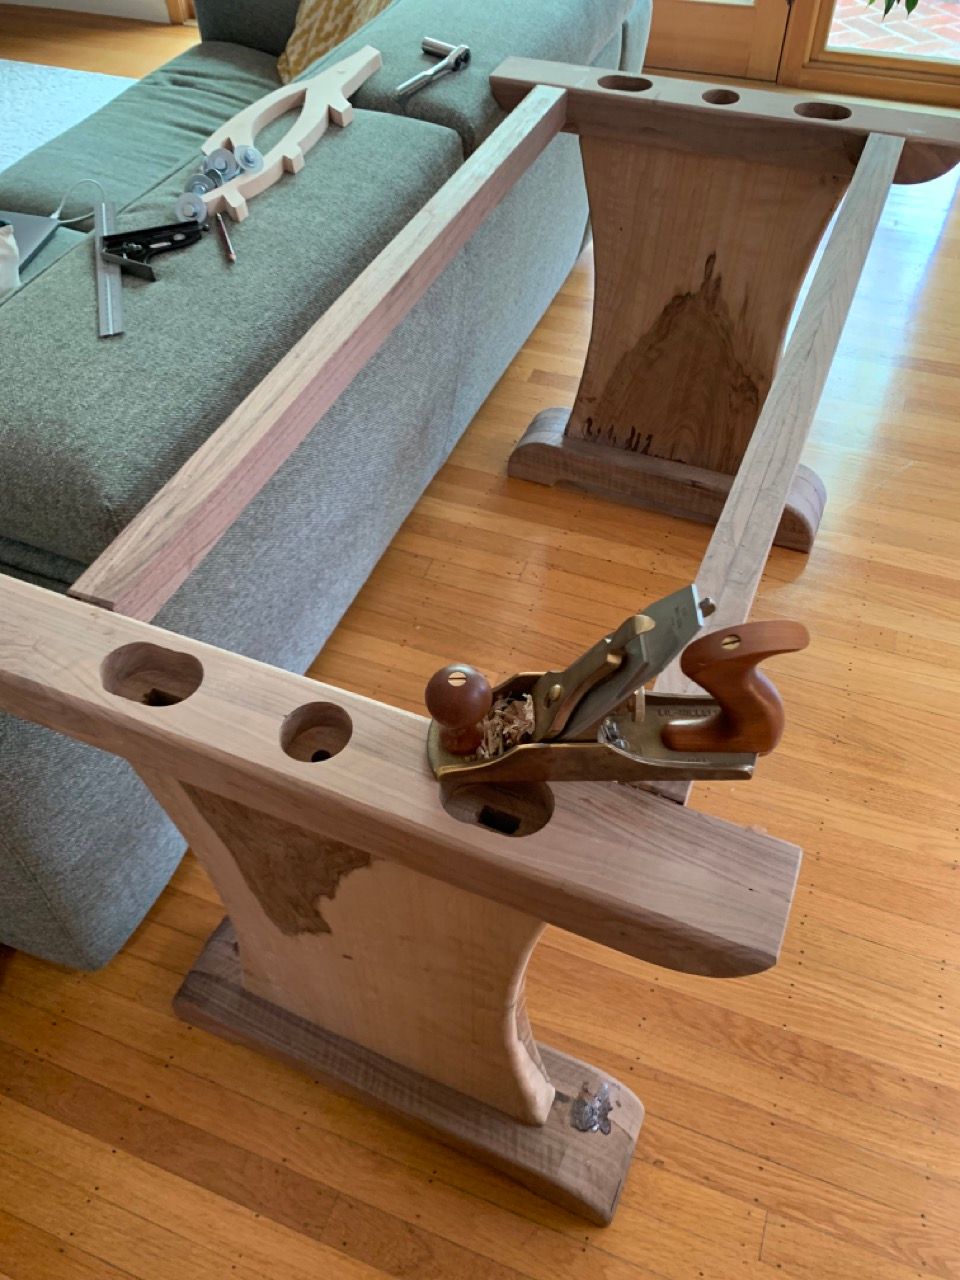
The overall fit of both ends and the 'skirt' under the table looks like this. I test assembled it and planed it flat with the smoother. All that is missing now is the stretcher in the middle to keep things rigid.
Cutting the stretcher
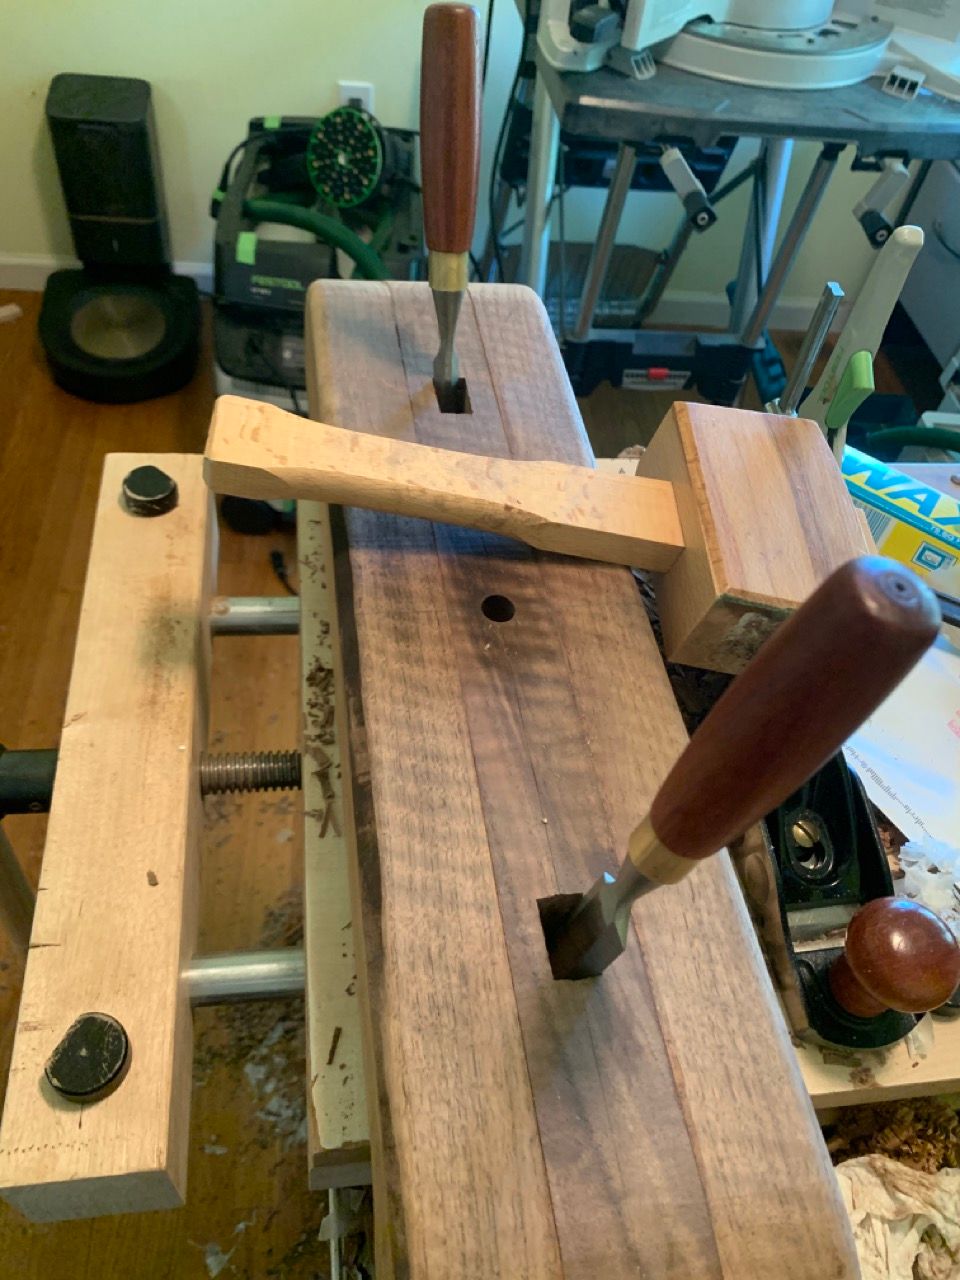
The stretcher is the pieces that holds together the ends of the trestle base and keeps it square, aligned and rigid. The stretcher was made out of another big walnut plank, pretty much as-is from the lumber yard. I didn't worry about any twist in the stretcher because nobody would ever notice. I simply planed both sides so they looked nice and hand-cut giant tenons on each end. The tenons were squared off with a Japanese shoulder plane purchased from a restorer in Taipei. Each tenon then required a mortise, through which a peg would have to fit. The pegs were sawed by hand from some Home Depot maple, their outlines traced with a pencil on the tenons, and then a mortise chopped inside the tenon from top to bottom. I used my pillar drill (drill press) to get some of the wood out of the mortise quicker but the sloped side and a good deal of clean out still required several hours of pounding away with bench chisels.
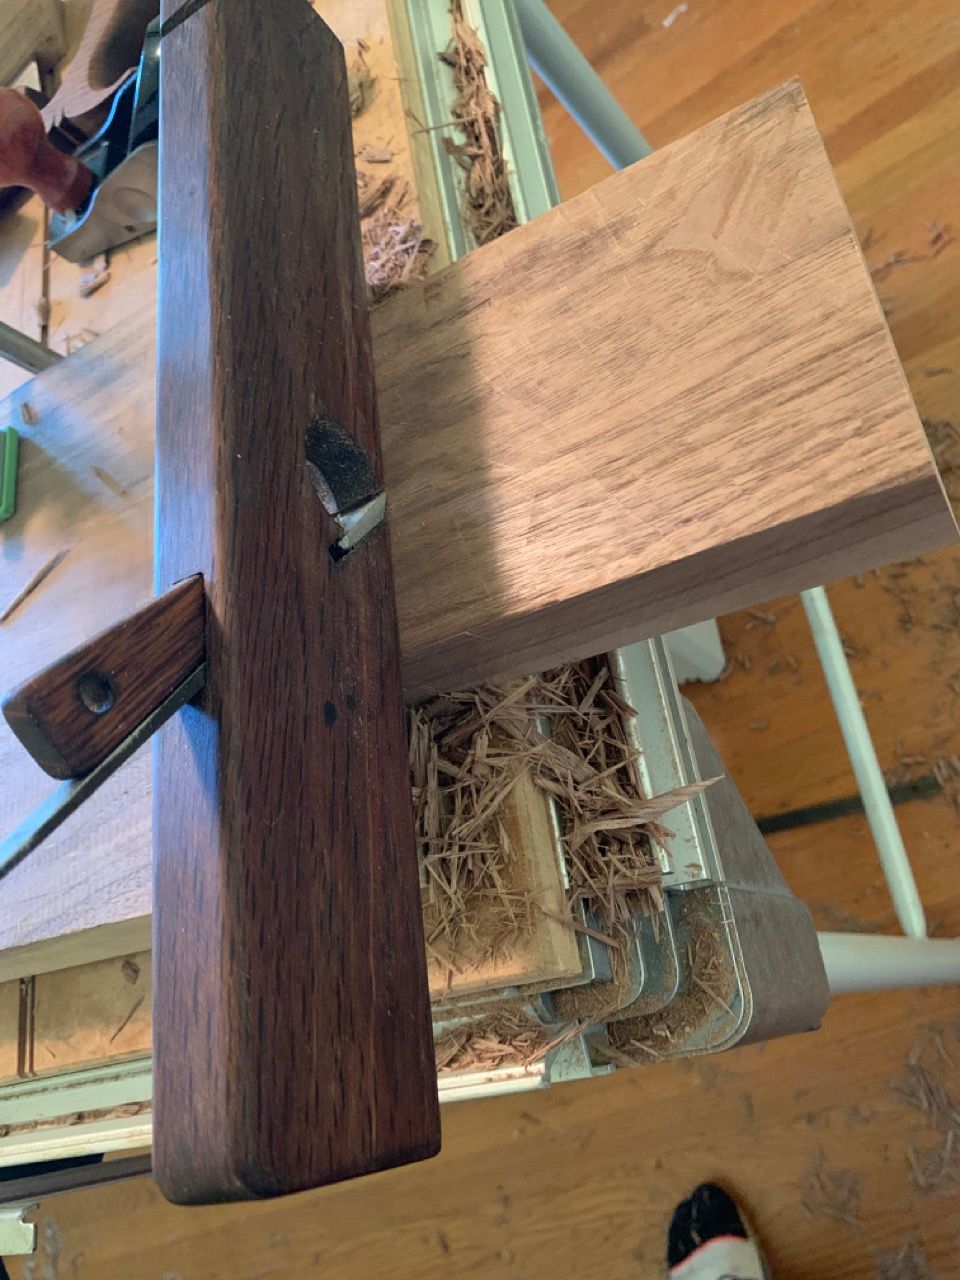
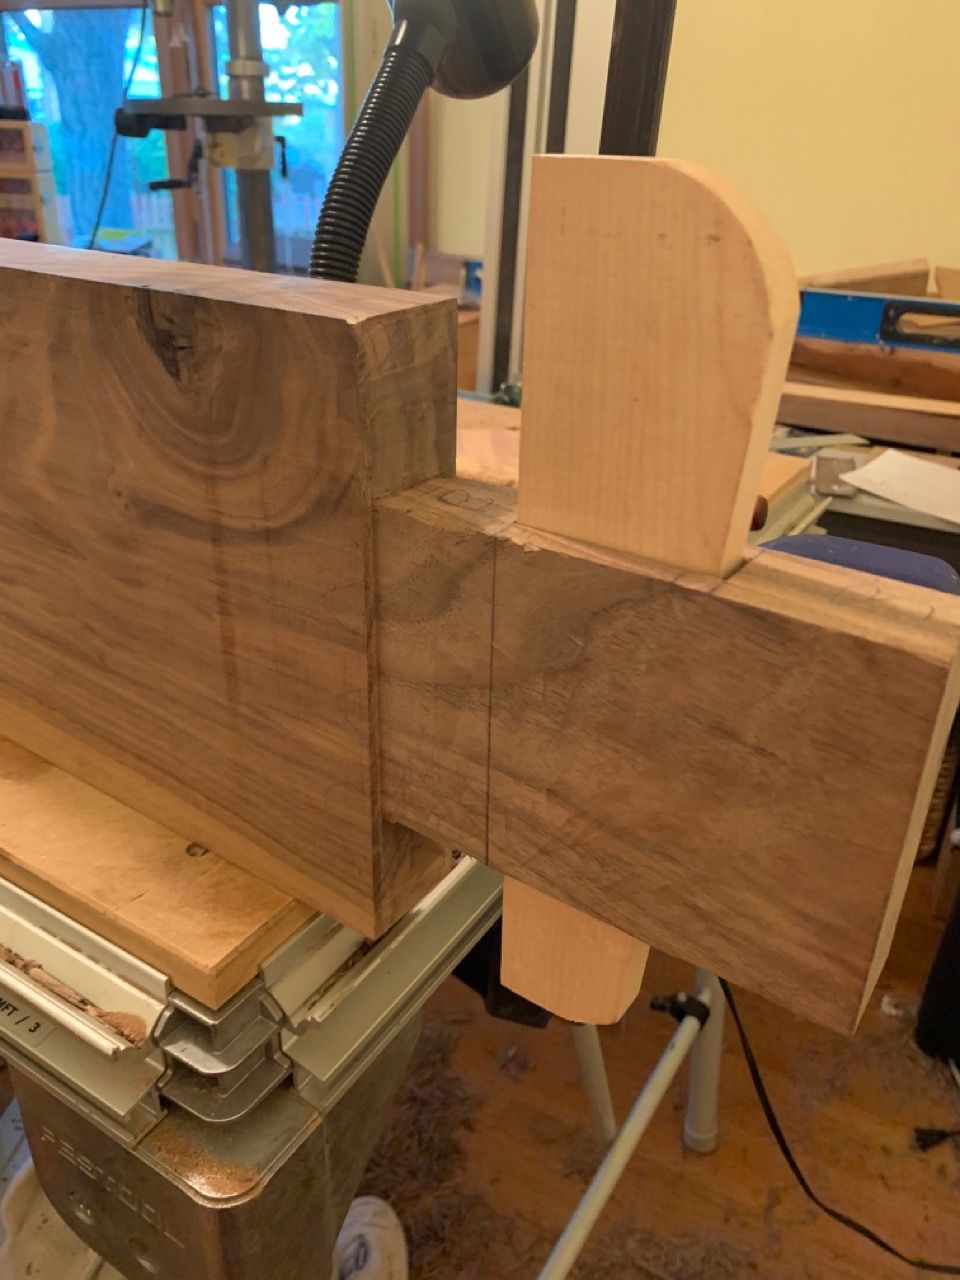
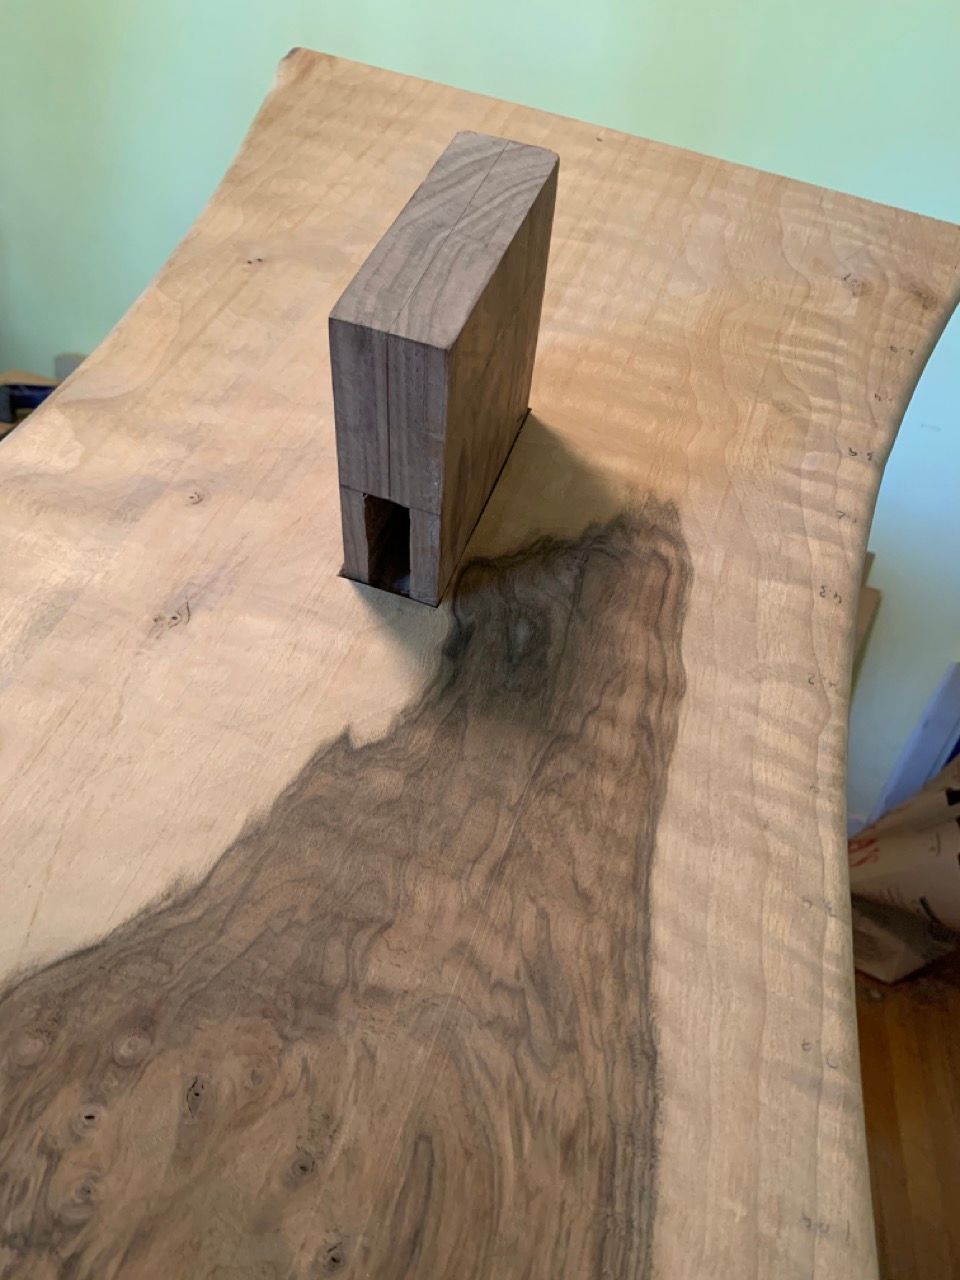
This photos hows how the joint overall fits together... perfect. The peg holds things in place, but one tap with a mallet and the peg pops out and the base of the table can be trivially dismantled. The edges of the stretcher were softened by chamfering with a spokeshave:
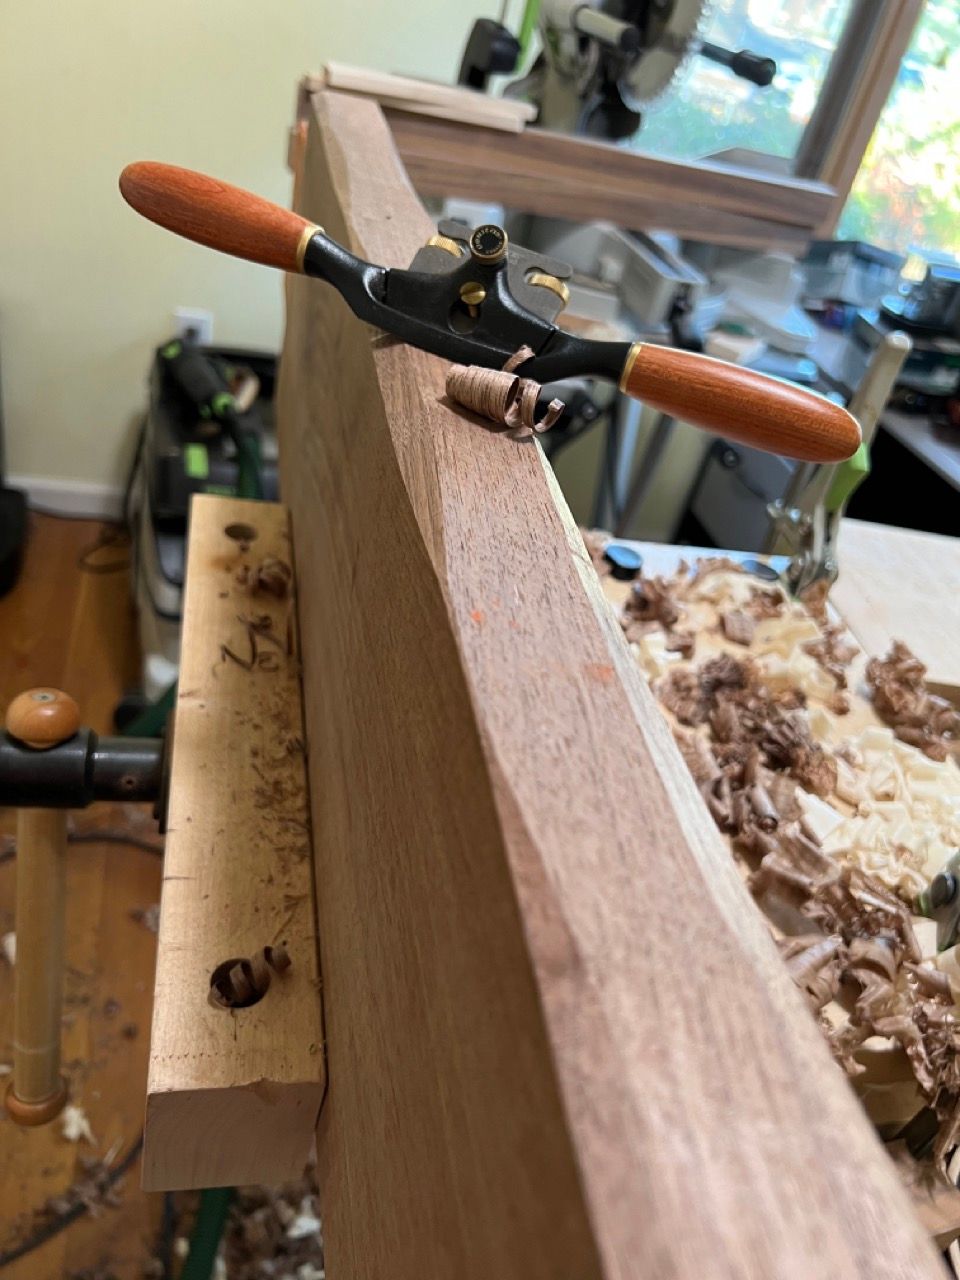
When put together, given the large stretcher and the square top, there isn't even the slightest bit of wobbling or stretching when the finished table is pushed. Not even a millimetre of slip in it. The tolerances are perfect. It all moves as one unit. It's incredibly rigid, far more so than any store-bought table I've ever seen. I'm truly astonished as to how well the wooden pegs work, holding the thing far tighter than screwed or bolted joints.
Assembly, crating and shipping
Miraculously (well, not really, by design, but still) it all came together and fit beautifully. The slit for attaching the metal Z clips for the tabletop were routed, the whole thing staged to make sure it looked good, then it was knocked back flat for shipping to the UK.
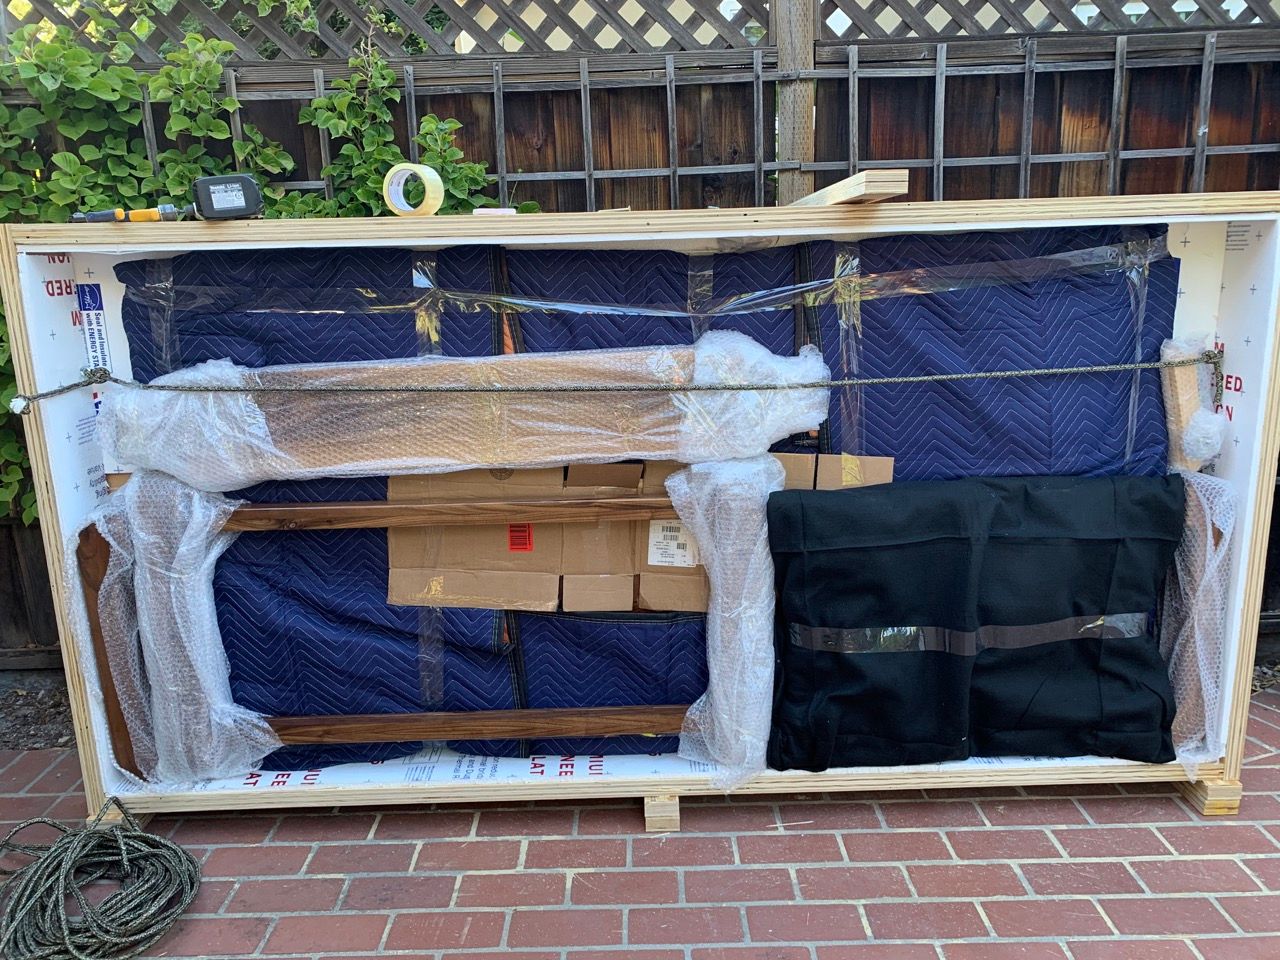
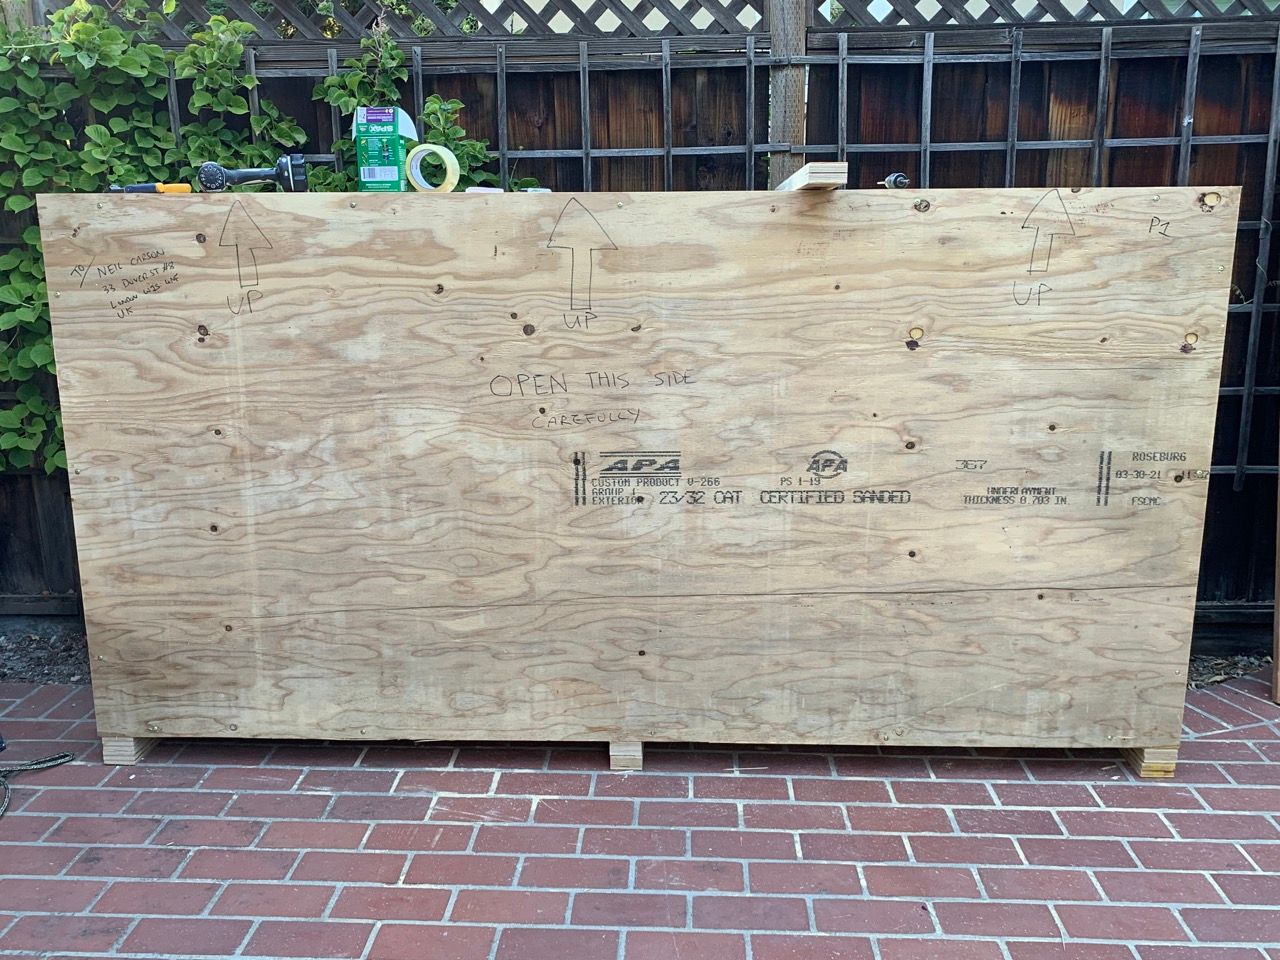
I decided to build a shipping crate myself because I'd never done so before and wanted to guarantee the table top got to London without damage. I custom-designed a crate to fit the table top and individual pieces perfectly.
Building the crate
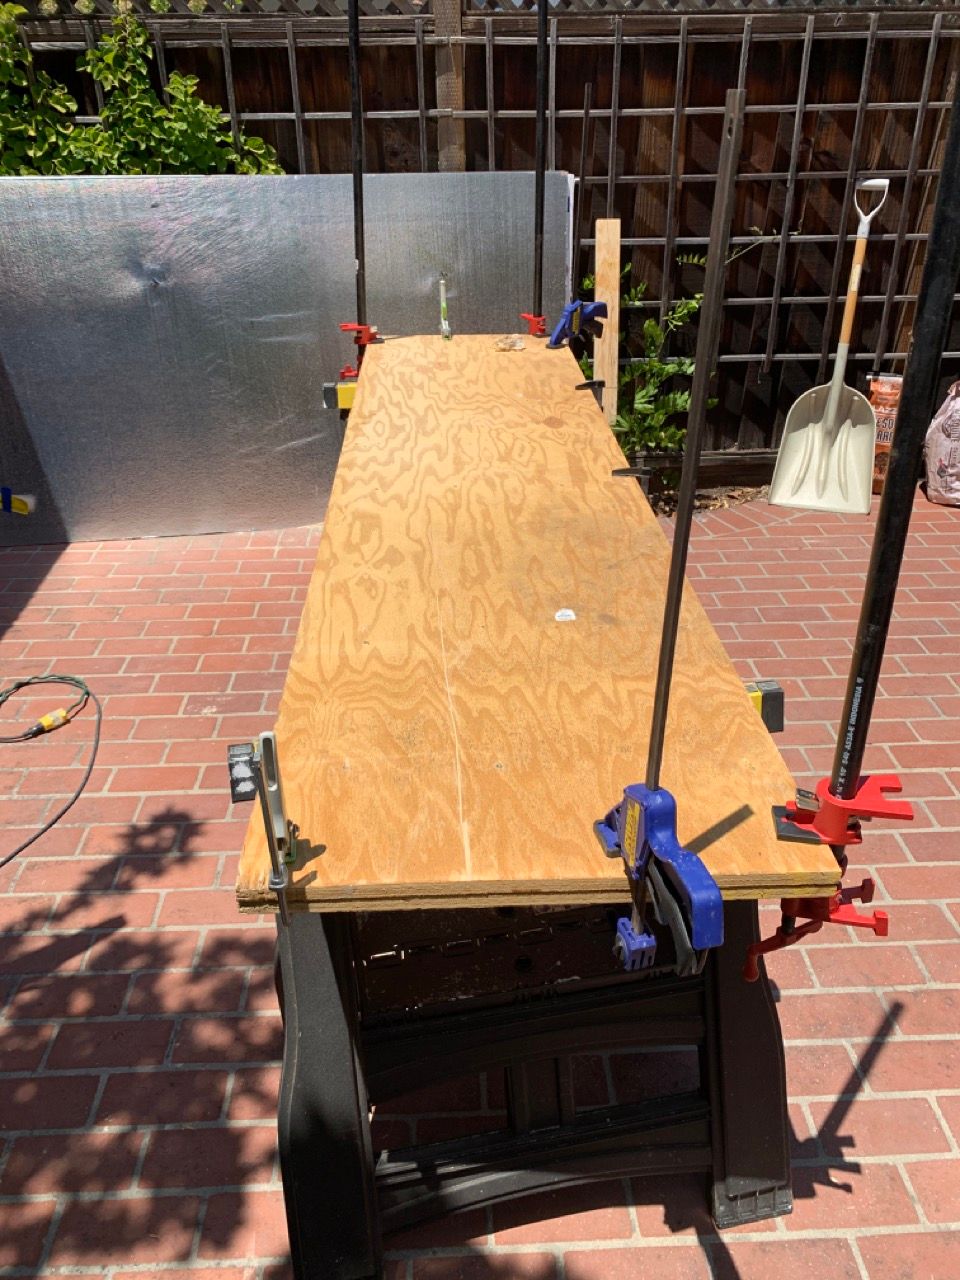
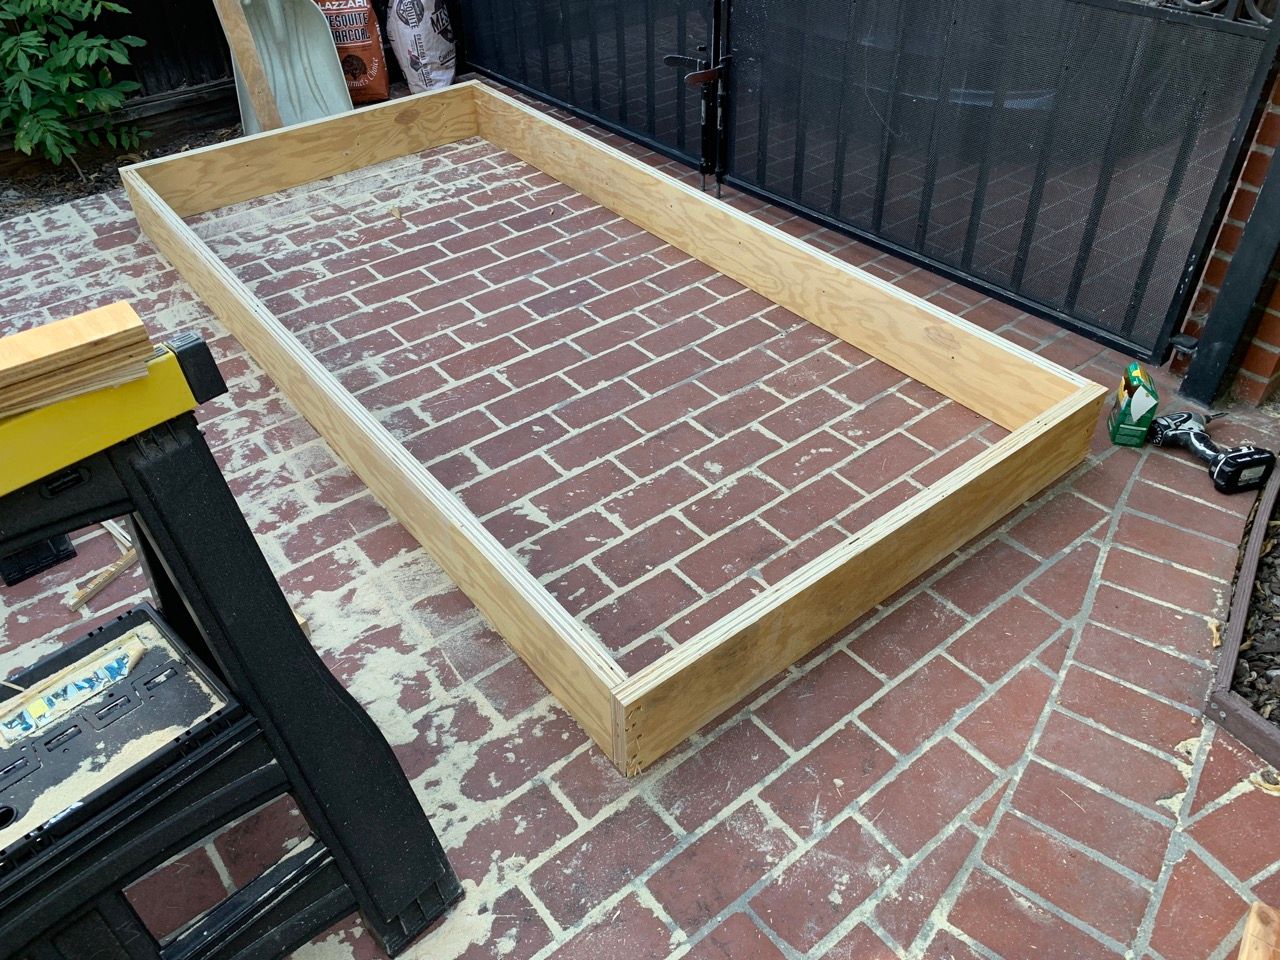
To build the crate, I bought sheets of 2'x10' 3/4" construction-grade plywood from Home Depot. Most shipping companies use half inch but I wanted to make sure if something gets driven into the side or whacked e.g. a forklift, there were still good odds that it wouldn't penetrate the exterior. In order to keep such a large crate rigid, and provide further protection, I glued up two such sheets to make 1.5" thick plywood strips for the top, bottom and sides of the crate. All this was cut to size with the trusty Festool track saw (I can't recommend a track saw highly enough although, from talking to professional carpenters, apparently the Mafell is even better), glued with leftover Titebond from making the table and the bits screwed together with Spax 3.5" construction screws.
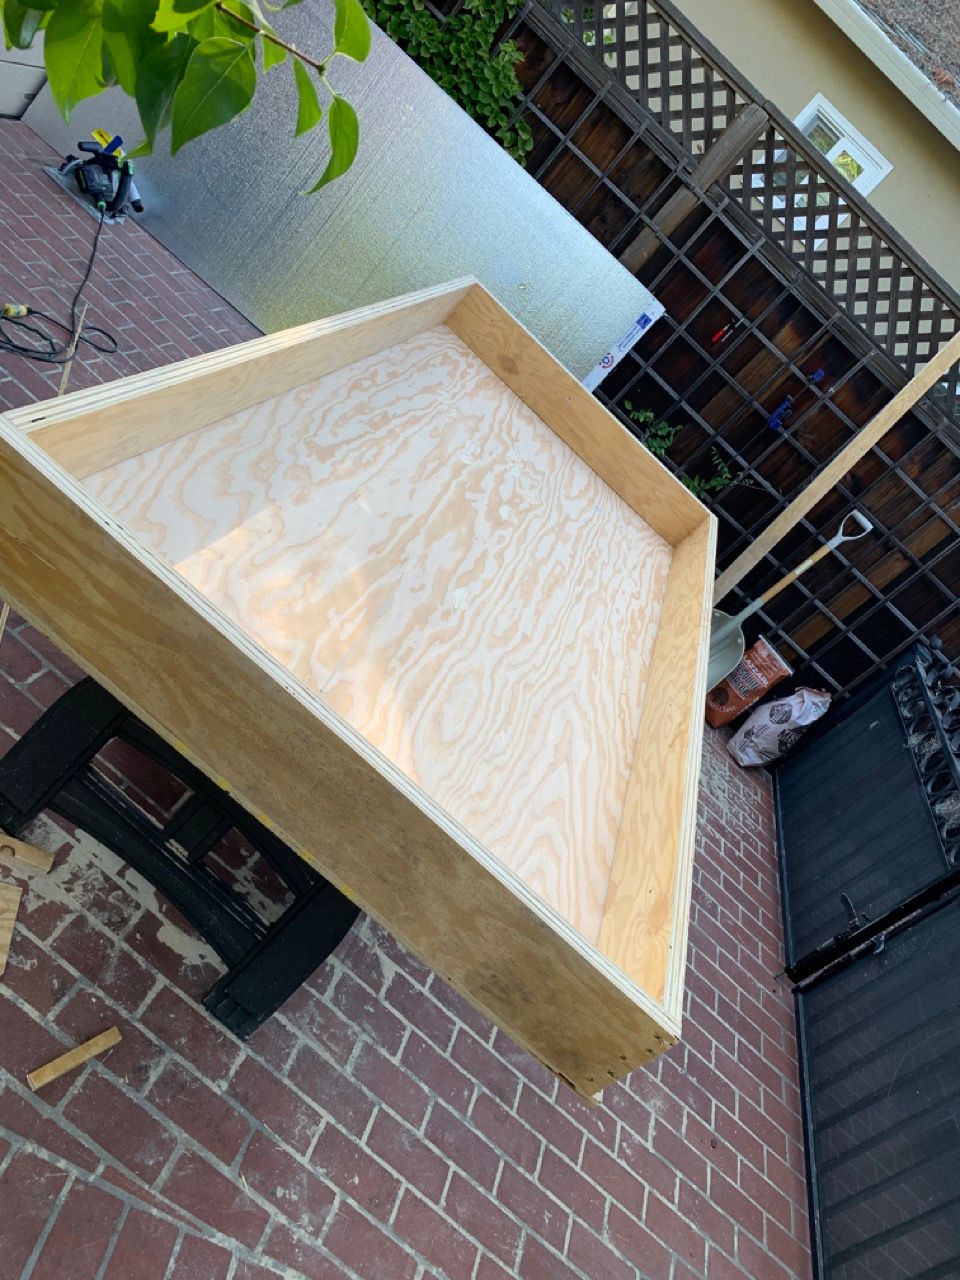
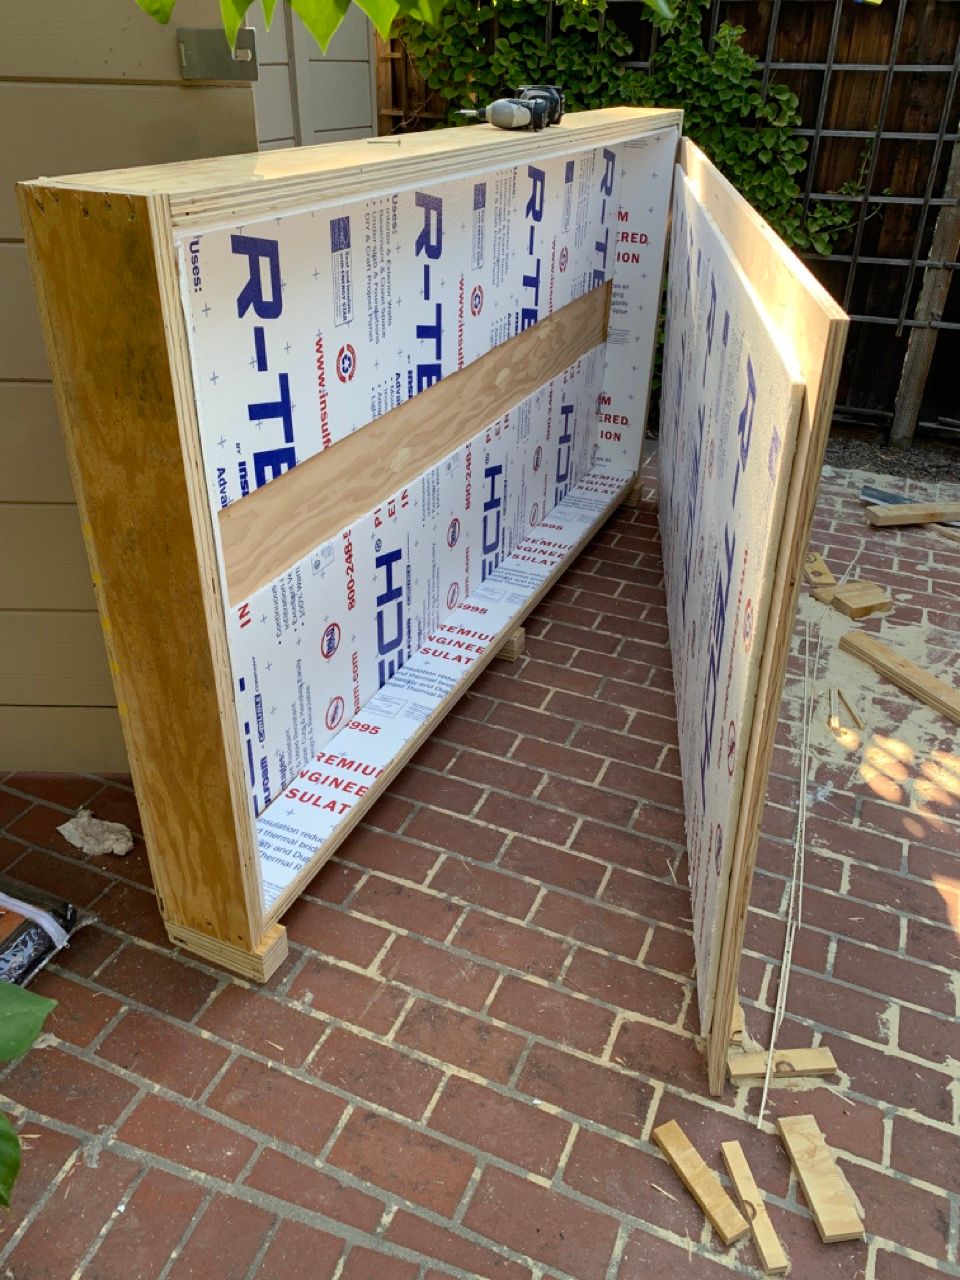
The inside of the crate was padded using sheets of half-inch polystyrene foam insulation which would also help keep moisture out of the inside while the crate was at sea, or if it got caught in the rain (I literally thought of everything here, I think). Finally, TG helped me wrap the parts in a moving blanket and carry them into the crate, then I screwed the lid on and it was ready for the moving company to pick up! The whole crate building sequence is below.

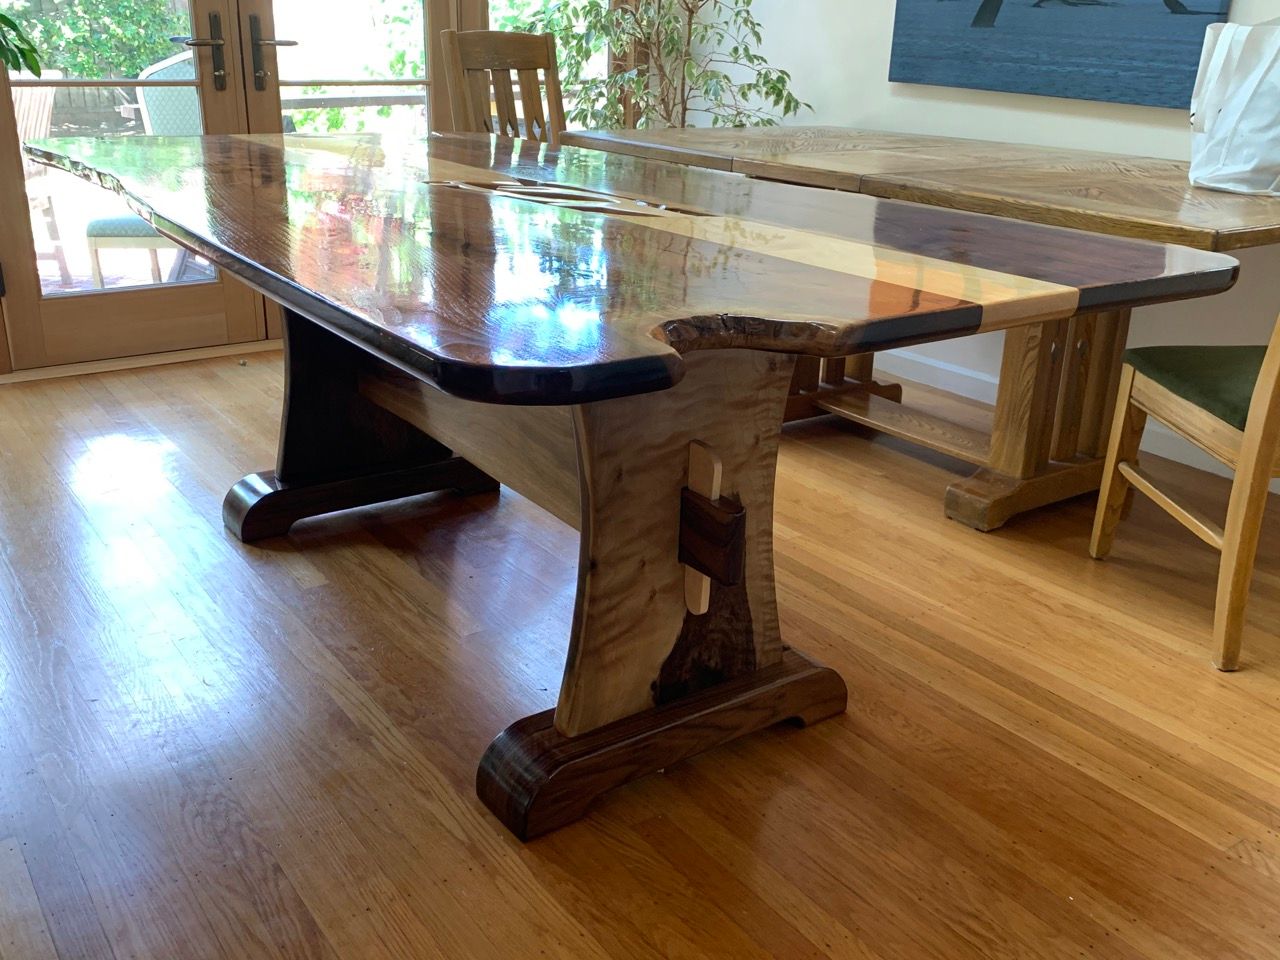
Surviving the trip and wrap-up
Suffice to say, the table got to London without so much as a scrap, and without any warping or cupping whatsoever. The humidity in the London flat is the same as Palo Alto so I don't envisage anything going wrong. The result is gorgeous and functional for both dinner parties, tea drinking, doing paperwork and sitting with laptops. I still need to rub out the finish to a more matte look. I am however a bit more worried about doing so, because of the live edge on the table top: It'll be hard to get into the nooks and crannies and take out all the gloss all over the place. In practice I might just leave it alone as-is.
I've now made two of these live-edged slab dining tables with collapsible wooden bases for flat packing. Some of the work was done in parallel to share templates and improve efficiency, but overall I think I've challenged myself sufficiently here. I've built massive things mostly with hand tools, done creative things with live edged slabs, built sophisticated wooden bases and crates to pack them in.
The next mediocre woodworking project will be repairing parts of the garden fence, then making some new kitchen cabinets out of plywood. In between I've just completed a mantlepiece as a housewarming gift for a friend. None of these projects are anywhere near as challenging as these dining tables!